Showing posts with label low-gi. Show all posts

Monday, September 24, 2012

garden breakfast juice


The weather is certainly getting warmer here and with it comes the desire for lighter and refreshing meals.
This also means that it is time to bust out the juicer and make it a permanent home on my bench top.


Before Joel ducked out to the markets to pick up groceries, I raided the refrigerator for what remnants of fruit and vegetables we had left to make a super breakfast juice. Talk about quick and easy breakfast! It’s just the clean-up that can be a bit of a fuss.. but it’s worth it.

I fed all the components through the juicer and poured it into a tall glass. Then went outside to sit in my garden to check on my summer seedlings and watch the little red-browed finches build a nest in the ficus tree next to our table and chairs.


Ingredients

(makes 400 mL)

2 carrots
3 oranges, skinned
1 grapefruit, skinned
1 inch piece of ginger
¼ bunch celery
1 medium beetroot

Wash all ingredient thorough and feed through the juicer.
Enjoy!

Wednesday, September 19, 2012

vegan apple pie


Okay, okay, okay, so my craving for apple pie was not entirely quenched by the tea that I came up with the other day. It kept coming to mind that I just wanted to enjoy a real, warm apple pie - and I finally gave in.


Joel hovered the whole time that I was making this. I've never seen him so interested in something that I am making. He would just wonder into the kitchen, sip on his beer and say 'mmm I love pie'.

The smell that filled the house was this warm, caramely rich and deep appley cinnamon smell that made it hard not to dig in as soon as the pie came out of the oven.

To top off this evening, a book that I have been eyeing off for over a year now has finally been released. I have it downloaded on the kindle app on my ipad ready to go.

So, I am going to love and leave you as I have a date with a book and some pie.


Ingredients

(makes 6-8 slices)

Pastry
2 c white spelt flour
1 tblsp fine sugar
3 tblsp non-dairy butter
45 ml iced water

Filling
4 apple (skin on), cored and sliced 1cm
1/4 c currants
1 tsp vanilla essence
1 tsp ground cinnamon
1 tblsp water

Pastry
In a medium sized bowl combine flour, sugar and salt.
Rub butter into flour until it resembles fine bread crumbs.
Create a well in the middle and slowly add water, cutting it in with 2 forks. 
Add enough water for the pastry to come together without being sticky.
Roll into a ball and refrigerate for 30 minutes.
Cut 1/4 of the pastry out and place back in the refrigerator.
Roll out the 3/4 of the pastry between two baking paper sheets.
Remove one side of the paper and invert into baking dish, press down and slowly remove the top sheet.
Trim off excess pastry and use to fill in any gaps.
Using a fork, poke holes in the pastry and place in oven for 20 minutes until golden.
Remove and cool.

Filling
While the pastry is in the refrigerator cooling, start the filling.
Combine all ingredients in a medium sized pot and heat on medium for 20 or so minutes until apples are softened.
Remove from heat and cool.

Assembly
Fill the pastry dish with apples.
Then, roll out the final 1/4 of pastry and cut into 2cm strips.
Lay each strip down diagonal, about 3cm apart down the length of the dish.
Repeat in the opposite direction.
Return to oven to bake for a further 20 minutes until golden.


Wednesday, September 5, 2012

dairy-free lamingtons


Lamingtons were a childhood favourite of mine.

They are one of my first baked treats that really worked out well for me, every time. From about the age of 13/14 I loved being in the kitchen baking. I have fond memories of hanging out on the bench helping mum while we made ANZAC cookies.
When I got the gist of baking on my own, most afternoons after school I would be straight into the kitchen and browse through my favourite cookbook of all time – Woman's Weekly ‘Sweet Old Fashioned Favourites’. The go-tos would be: Devil’s Food Cake, Vanilla Slice, Coconut Ice, ANZAC Cookies and of course Lamingtons.


Now that I am older and my tastes have changed, I find myself baking less and less. But I was feeling nostalgic and decided to come up with a dairy-free, low-gi option for one of my all-time favourite homemade bakes.

I was amazed at how similar to the old version these were! The main difference was the coconut sugar in the sponge as it added a deeper rich caramel flavour. Yum!


Ingredients

(makes 12)

Sponge
3 eggs
1/2 c coconut sugar
1/2 c self raising flour
1/2 tsp bi-carb soda

Icing
1/2 c cocoa powder
1/4 c agave syrup
1/8 tsp stevia powder
1 tblsp cocoa butter
1 tblsp creamed coconut or coconut oil
1 vanilla bean, scraped
1/4 c water
tiny pinch of salt

chipped coconut

Sponge
Heat oven to 150 degrees and line a 9"x12" baking dish with baking paper.
Beat eggs in a medium bowl until thick and creamy.
Slowly add coconut sugar until well dissolved.
Next, slowly fold through sifted self-raising flour and bi-carb soda.
Pour mixture into the dish and bake in oven for 20 mins.
Remove from oven and cool completely.

Icing
Bring a saucepan to boil, half filled with water.
Next combine all ingredients for the 'icing' in a small bowl and stir constantly over the boiling water until butter is melted.

Assembly
Slice sponge into small squares.
Dip each square into 'icing' then roll into the chipped coconut and place on a plate.
Repeat the process for all the squares and place the plate in the refrigerator to cool.
Store in an airtight container in the refrigerator for up to a week.

Tuesday, August 28, 2012

spiced apple and pear roll-ups


I know, I know, I’ve been a little silent on here. But for good reason as we have been at the snow for the past week.

It was amazing; fresh powder, super drop offs and jumps, absolutely worth the aches and pains. On top of that, it was just so nice to have a holiday with Joel again, even if it wasn’t restful, it is just so nice to be active and creating new memories together.
 

Our time on the slopes was exceptional, however our car started playing up pretty early on in the week and we ended up losing all our radiator fluid in 20mins intervals. We took it to a mechanic who said that the job would take him 8-12 hours to pull the engine apart and find the root of the issue*. As we didn’t have time for this, we decided to keep chugging along with a massive drum of coolant and water in the back of the car for top-ups. Our major stress was always going to be the drive home.
We left the snow at 4pm and made it home by midnight – not a bad effort for a 6.5 hour drive, stopping every 10-20 mins.

*Not to mention the car had been in the shop for 2 months right before we left for the snow. Our timing belt went and we had to replace the engine.


I haven’t had time to really document a new recipe amidst the car issues, washing, unpacking, shopping and work. So I’ve decided to post this snack which I made before we left for the snow.
We had a heap of pears and apples to use up in the refrigerator and what better way to use them all up than making roll-ups. A healthy, easy-pack energy hit for the hill.


Ingredients

(makes 24)

5 large apples (mixed red & green)
5 large pears
1 tsp cinnamon

Roughly chop the apples and pears and place them in a heavy based saucepan with an inch of water.
Simmer until soft, remove from heat and cool.
Add cinnamon, and softened fruit to a blender and whiz until smooth.
Scoop out and spread evenly (1/2 cm thick) on dehydrator trays – approx. 4 trays.
If you don’t have heaps of Teleflex sheets (like me), line the trays with baking paper.
Dehydrate on 40 degrees for 15-20 hours.
While still warm, slice each sheet into 6 portions and roll tightly.
Store in an airtight container for a week or 2.

I was totally having too much fun to take many pictures, so there's a few iPhone shots.

Early morning drive down to the snow, 4am start.

First day up, just stunning.

Joel always looks confused when taking photos.

We had a blizzard day; the most dangerous drive ever. I was just like bumper cars, we luckily came away unscathed.

Yeah, snow!

Friday, August 17, 2012

walnut, chia and rhubarb cookies

I’ve been utilising the dehydrator a bit more lately, can you tell?

This time is a fruity healthy cookie cracker. Gluten-free, grain-free, dairy-free, vegan, no added sugar, low-gi, mostly raw.. they are the perfect on-the-go snack.


Joel says they are more like fruit crackers than cookies. But I think he had greasy, buttery cookies on his mind when I produced these for him to try.
His verdict: they are really tasty, but you spend the next couple of minutes picking chia seeds out of your teeth.
I know this would bother him, because, Joel is a minimal effort kind of guy when it comes to food. He won’t eat muesli because it takes too long to chew. Yep, he is a different sort.

These ‘cookies’ (and I use the term loosely) are an impromptu idea I had to use up a bunch of rhubarb that was sitting in the refrigerator.

What?! Use up rhubarb! Like it is some kind of space waster.
It is not like that at all. Honest.

I love rhubarb, but because we are leaving in a couple of days for the snow (for a week) and I couldn’t justify baking it into something that would not keep – or that doesn’t travel well.

Alas! Dehydration.


Ingredients

(makes 20+)

1/4 c chia seeds
1 1/2 c water

1 bunch rhubard, chopped into inch long lengths
1 tblsp water

1 c walnuts, soaked for 12 hours and drained

2 bananas, mashed
1 tsp cinnamon, ground
1 tsp vanilla extract

Mix chia seeds and water and set aside for 20 mins so the seeds can activate.
Next, place rhubarb and water in a small pot and heat until the fruit is soft.
Remove from heat and cool.
Empty walnuts into a food processor and blend until smooth and creamy.
Next add the bananas, cinnamon, vanilla and rhubarb to the walnut mixture and process until well combined.
Then, gently fold through the chia seeds.
Line dehydrating trays with parchment or teleflex sheets.
Place a cookie cutter on the tray and spoon in 2 tblsp sized portions - or whatever will fit.
Gently remove the cookie cutter and repeat until the mixture is all used up.
Dehydrate on 40 C for 20 hours.


Wednesday, August 15, 2012

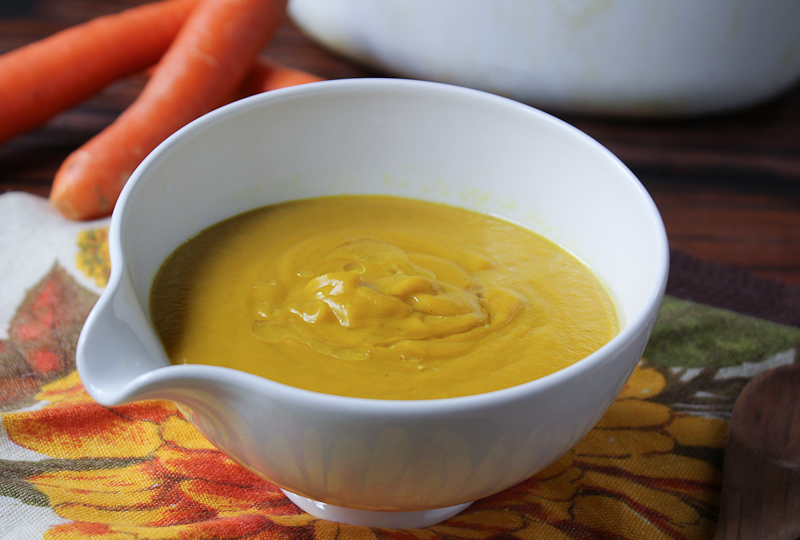
orange soup


I am calling this one my 'orange' soup because of the intense rich colour of the ingredients I've used.

Orange foods are high in carotenoids, which have been shown to decrease the risk of cancers, such as; lung, colon, bladder, cervical, breast and skin. Carotenoid consumption also protects against the risk of macular degeneration and cataracts - which is where the old wives tale comes in, that eating carrots will make you see in the dark.
Orange coloured foods help cleanse the body of toxins and stresses. Vitamin C and zinc work together to provide an excellent detoxifying combination helping the body rid itself of heavy metals and other pollutants.

Also high in Vitamins A, C and minerals such as calcium, copper, selenium, zinc - orange foods are a 'must' in your diet.


I made such a large amount of this soup so that I could freeze individual portions to take for lunch at work.

It has been delightfully satisfying and warming over the past week, as we've had a bitter cold snap - I really don't mind, because it means more snow!


Ingredients

(makes 6-8 serves)

2 kg carrots, roughly chopped (skin on)
2 leeks, roughly sliced
2 brown onions, peeled and roughly chopped
2 c pumpkin, cubed (skin off)
1 kumera, roughly chopped (skin on)
1 tsp turmeric, ground
1 tsp cinnamon, ground
1 tsp curry powder

2 tblsp creamed coconut

coconut oil and salt to taste

Place all ingredients except for the creamed coconut, in a large heavy based pot.
Add enough water to cover the vegetables by an inch - bring to the boil.
Reduce heat and simmer for 30 mins until vegetables are soft (ie. you can poke a knife easily through).
Turn off heat and stir through creamed coconut.
When cool enough, transfer contents to a blender and process until smooth (you may need to do this in batches).
Return to pot and reheat, adding salt to taste.
Serve and drizzle with a small amount of coconut oil.


Tuesday, August 7, 2012

lemon myrtle and poppy seed cracker: raw


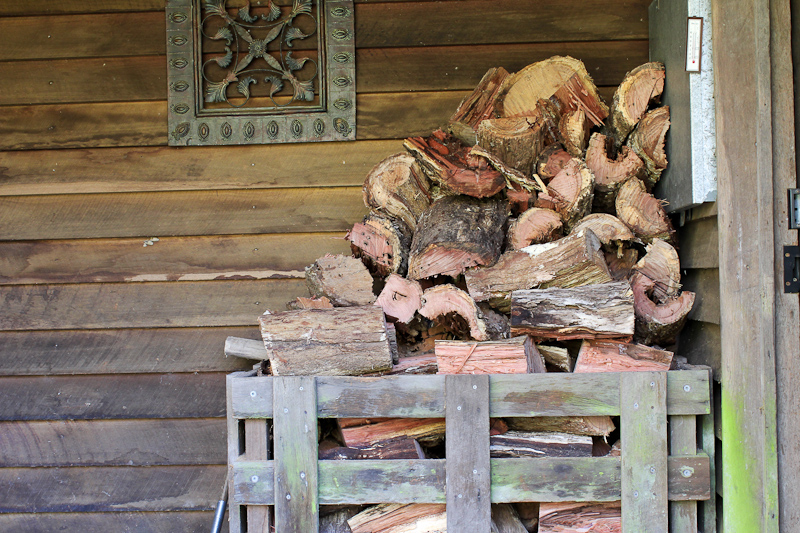
Last winter we would be out on the property every weekend, chopping, collecting and stacking firewood for the week ahead. We have been lazy this winter and used my father’s contact for bulk fire wood.


Sadly, this contact has now fizzled out and our wood pile has slowly dwindled to nothing.
So, we loaded into our run-around car and up the hill we went. Joel chainsaw’ed and I followed him around loading the car full of logs. Then when we got back to the house, we unloaded and Joel chopped it all while I stacked. We make a good team!

I love my lumberjack man.

It’s been forever since I’ve posted a dehydrated recipe. It still runs regularly with fruits, crackers or dog treats.

So I thought I would share my latest cracker recipe with you. It’s delightfully fresh with the hints of lemon and pepper, perfectly wonderful on their own or alongside a tasty dip.

I had the crackers run over night so they would be ready by the next day. After our wood collecting efforts we munched a few down, nourishing our bodies with the super healthy benefits of the chia and cashews.


Ingredients

(makes 3 trays worth or 40 crackers)

1/2 c black chia seeds
1 1/2 c water

1 1/2 c raw cashews, soaked for 12 hours
1 tblsp poppy seeds
1 tsp lemon myrtle
1 lemon, juiced
pinch of salt
1/2 tsp black pepper

Combine chia seeds and water and set aside for 30mins to activate seeds.
Place drained cashews in a food processor and whiz until smooth.
Stir poppy seeds, lemon myrtle, juice, salt and pepper into the cashew mixture.
Next, slowly fold through the chia seeds until well combined.
Spread mixture onto dehydrator trays.
Tip: I don't have many teleflex sheets, so I find it useful to line the trays with baking paper.
Dehydrate on whatever setting you would use for fruit (level 2 for me), for 5 hours.
Then score the crackers to whatever size you would like.
Dehydrate for a further 10 hours.


Friday, July 27, 2012

rustic protein bars: vegan


We’re off to the snow this weekend for a small taster before our big week on the slopes in August.

Our snow gear has been in storage for 2 years as we missed last year’s season and the one before we were overseas. Digging out our gear was fun, it felt like Christmas again. I was constantly saying ‘Oh, I’d forgotten I had that!’. We hung our jackets and pants on the stairs to get some air, but it only made us more impatient to be at the snow.

So, we’re excited.

Joel is a snow boarder, but I’m a skier from way back. It’s always fun to tease each other on the slopes, as we’ve got totally different styles.


In the mad rush of getting everything together, I wanted to make a healthy and cheap energy hit that we could just take with us on the hill.

Because of the busyness I didn’t spend too long on the pretty-ness of these bars, so they really have that ‘rustic’ look.

I know they look rough, BUT, they are ever so yum and will do the trick for our protein and energy hits.

Ingredients

(makes 16)

Dry
1 c rolled oats
½ c coconut flakes
¼ c protein powder (I’ve used hemp seed protein)
½ c dried/dehydrated fruit (I recently dehydrated some fresh cranberries and gooseberries – took 12 hours)
¼ c pine nuts

Wet
¼ c agave syrup
¼ c unhulled tahini
2 tblsp coconut butter
½ c water


Heat oven to 130 C and line a loaf/slice tin with baking paper.

Combine dry ingredients in a large bowl.
Heat the wet ingredients in a small pot over the stove until tahini is well integrated.
Pour the wet ingredients over the dry and stir well to combine.
Spoon mixture into the lined tray and press mixture firmly down.
Place in oven and cook for 45 minutes to an hour.
Cool completely before slicing.
Can store in the refrigerator for up to 2 weeks or freeze pulling them out as required.