Showing posts with label light. Show all posts

Friday, March 8, 2013

sandwich cake - smörgåstårta


So, mostly it is a ghost town on this site - I can explain! 

It's not that I don't want to be posting, it's just that I've been flat out with work and the impending birth of our daughter. Somehow that doesn't seem like a good enough excuse, but it's all I got.


Last weekend I was fortunate enough to have a baby shower with friends and family. It was a fantastic day and I was so overwhelmed by the generosity of those wonderful people. I worry that I'll never be able to show how much I appreciate every ones gifts, love and support.


Anyways, for the shower I finally tackled something that I've been wanting to make for such a long time - Smörgåstårta! Basically it is a Scandinavian savoury cake that often pops up at celebrations.

Honestly I couldn't believe how easy it was to put together and the best bit by far was the alternate decorating. Usually with cakes you use sweets or icing to decorate but for this, you have to keep it savoury which means you get to be creative.

You can fill it with whatever you want, like deli meats, tuna, egg, smoked salmon, etc - but I've kept it vegetarian.


iced teas

the spread


Smörgåstårta

Ingredients

1loaf of wholemeal spelt bread (homemade or otherwise)

1 lemon, juiced mixed with 2 tbsp water
500g natural organic yogurt, drained for 2 hours or so
1 cucumber, finely sliced
1/2 c sun dried tomatoes
400g cream cheese (reduced fat is okay)

green leaves, herbs, edible flowers, other veggies - for decorating

Method

Cut the crusts off the loaf, then slice length ways into 3.
Arrange one of the slices on your presentation dish.
Using a pastry brush, brush the top of the slice with 1/4 of the lemon juice mixture.
Arrange 1/2 the cucumber slices on top, then spread over 1/2 the yogurt. Top the yogurt with the remaining slices of cucumber.
Next, stack other slice of bread, brushing the under layer and top with another 1/4 (each side) of the lemon juice.
Place the sun dried tomatoes and remaining yogurt in a food processor and blend for about 20-30 seconds.
Spread over the slice of bread and top with the remaining slice of bread (brushing the underside with the remaining lemon juice).
Cover and place in refrigerator overnight (with a weight on top, a plate works fine) to allow flavours to infuse.

About an hour or so before serving, decorate the cake. 
Spread the cream cheese over the loaf and decorate it to your hearts content.
I've used marigolds, parsley, chervil, mint leaves and lettuce leaves. Also, the day before I peeled a fresh beetroot and carrot, rolled them to look like a rose, securing the bottom with a toothpick.


Monday, September 17, 2012

red lentil burgers


Is life just busier? I feel the days are going faster than ever and any spare time that I have gets filled up pretty quickly. I don't mind though, I love fitting as much into life as possible that's just living, right?!

After a busy weekend and a full day at work I came home, chopped the fire wood, started the fire, then got started on these beauties.

Luckily there were heaps more burgers than I anticipated which means I can stock the freezer for a quick lunch option on work days. Sometimes with all the rushing, it's good to have a healthy back-up meal that you can defrost for a quick satisfying lunch or dinner and this is surely one.


Ingredients

(makes 20)

1 1/2 c split red lentils, soaked for 6-8 hours

1 c walnuts
2 carrots, grated
1 brown onion, grated

1 c besan flour
1 tsp bi-carb soda
1 tblsp savoury yeast flakes
2 eggs, lightly whisked

olive oil, for greasing
salt and pepper, to taste

Heat oven to 180 C and line a large baking tray with parchment paper then lightly grease with oil.
Bring lentils to boil in a heavy based saucepan.
Cook for 15-20 minutes until soft, then drain and set aside to cool.
Add walnuts to a food processor/blender and pulse until crumbled.
Mix walnuts, carrots and onion in a medium sized bowl.
Next add in the lentils and remainder of ingredients, mixing until well combined.
Using wet hands, scoop small handful sizes of the mixture then roll into a ball.
Place on tray and push down lightly to flatten out.
Repeat until all the mixture has been used.
Place tray in oven for 25 minutes, then flip the burgers and bake for a further 15 minutes.
Serve!

Wednesday, August 15, 2012

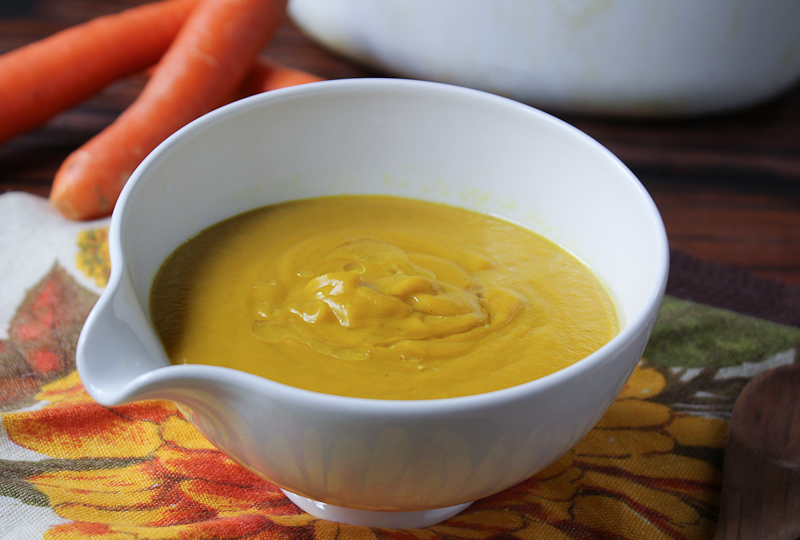
orange soup


I am calling this one my 'orange' soup because of the intense rich colour of the ingredients I've used.

Orange foods are high in carotenoids, which have been shown to decrease the risk of cancers, such as; lung, colon, bladder, cervical, breast and skin. Carotenoid consumption also protects against the risk of macular degeneration and cataracts - which is where the old wives tale comes in, that eating carrots will make you see in the dark.
Orange coloured foods help cleanse the body of toxins and stresses. Vitamin C and zinc work together to provide an excellent detoxifying combination helping the body rid itself of heavy metals and other pollutants.

Also high in Vitamins A, C and minerals such as calcium, copper, selenium, zinc - orange foods are a 'must' in your diet.


I made such a large amount of this soup so that I could freeze individual portions to take for lunch at work.

It has been delightfully satisfying and warming over the past week, as we've had a bitter cold snap - I really don't mind, because it means more snow!


Ingredients

(makes 6-8 serves)

2 kg carrots, roughly chopped (skin on)
2 leeks, roughly sliced
2 brown onions, peeled and roughly chopped
2 c pumpkin, cubed (skin off)
1 kumera, roughly chopped (skin on)
1 tsp turmeric, ground
1 tsp cinnamon, ground
1 tsp curry powder

2 tblsp creamed coconut

coconut oil and salt to taste

Place all ingredients except for the creamed coconut, in a large heavy based pot.
Add enough water to cover the vegetables by an inch - bring to the boil.
Reduce heat and simmer for 30 mins until vegetables are soft (ie. you can poke a knife easily through).
Turn off heat and stir through creamed coconut.
When cool enough, transfer contents to a blender and process until smooth (you may need to do this in batches).
Return to pot and reheat, adding salt to taste.
Serve and drizzle with a small amount of coconut oil.


Monday, August 13, 2012

fresh pea citrus salad


Fresh peas will forever take me back to my childhood.

My Grandfather has always had a vegetable garden, even now when he is in his mid-eighties he is growing turmeric, ginger, squash, kohlrabi, passion fruit, tomatoes.. and the list goes on.

When I was younger, I would always raid his fresh pea vine.
Seriously, whenever we visited I would strip the plant of all it's juicy peas and devour them on the spot. Slowly making my way along the fence that the vine grew, I was like a pacman.


Not much has changed since childhood though.

Because whenever I visit now, I ask Granddad to take me straight to his garden and show me what he's been growing - although, I don't eat anything without permission these days.

But, if I'm super lucky, he'll pack me up some of his treats and send me on my way.


Ingredients

(makes a side for 2)

1/2 c fresh peas, shelled
1/2 c snow peas, diagonally sliced
1/2 lemon, juiced
1 tsp lime rind, finely grated
5 basil leaves, finely sliced
2 tsp olive oil

Combine all ingredients in a bowl and toss well.
Serve.


Tuesday, August 7, 2012

lemon myrtle and poppy seed cracker: raw


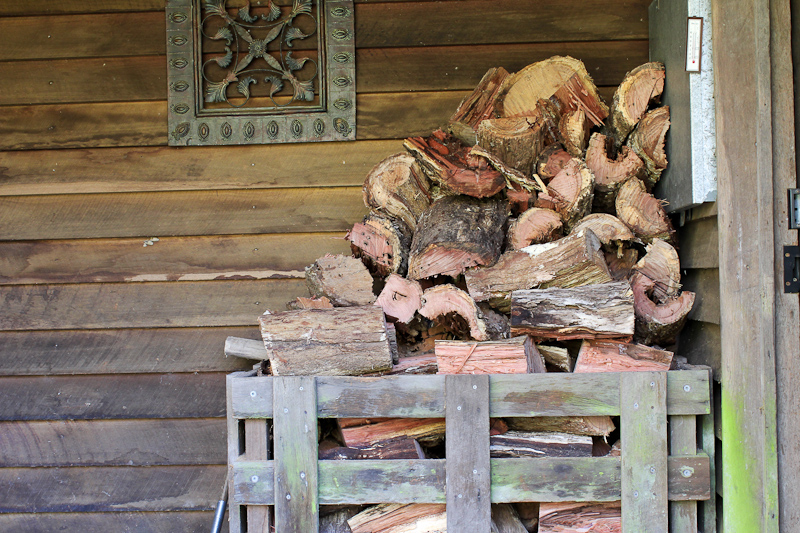
Last winter we would be out on the property every weekend, chopping, collecting and stacking firewood for the week ahead. We have been lazy this winter and used my father’s contact for bulk fire wood.


Sadly, this contact has now fizzled out and our wood pile has slowly dwindled to nothing.
So, we loaded into our run-around car and up the hill we went. Joel chainsaw’ed and I followed him around loading the car full of logs. Then when we got back to the house, we unloaded and Joel chopped it all while I stacked. We make a good team!

I love my lumberjack man.

It’s been forever since I’ve posted a dehydrated recipe. It still runs regularly with fruits, crackers or dog treats.

So I thought I would share my latest cracker recipe with you. It’s delightfully fresh with the hints of lemon and pepper, perfectly wonderful on their own or alongside a tasty dip.

I had the crackers run over night so they would be ready by the next day. After our wood collecting efforts we munched a few down, nourishing our bodies with the super healthy benefits of the chia and cashews.


Ingredients

(makes 3 trays worth or 40 crackers)

1/2 c black chia seeds
1 1/2 c water

1 1/2 c raw cashews, soaked for 12 hours
1 tblsp poppy seeds
1 tsp lemon myrtle
1 lemon, juiced
pinch of salt
1/2 tsp black pepper

Combine chia seeds and water and set aside for 30mins to activate seeds.
Place drained cashews in a food processor and whiz until smooth.
Stir poppy seeds, lemon myrtle, juice, salt and pepper into the cashew mixture.
Next, slowly fold through the chia seeds until well combined.
Spread mixture onto dehydrator trays.
Tip: I don't have many teleflex sheets, so I find it useful to line the trays with baking paper.
Dehydrate on whatever setting you would use for fruit (level 2 for me), for 5 hours.
Then score the crackers to whatever size you would like.
Dehydrate for a further 10 hours.


Wednesday, August 1, 2012

baked rice paper rolls


I have a love of rice paper rolls.
But, Joel has an absolute love of spring rolls.
They are both great for dipping and serving as an entrée.

Not so long ago I wanted to see what it would be like to bake a rice paper roll, to see if it would be a healthier option of the greasy spring rolls. I was so surprised with the outcome. Retaining their freshness but still having a crunchy outer shell, they made for a great alternative.

When I gave one to Joel, he did his infamous “mmm tastey” and I knew I was on a winner.


It’s fun wrapping up the spring rolls, it can take a bit of practice but it’s super easy once you get the gist of what you are doing.

Keep in mind that these baked rolls don’t have to be Asian inspired, but could be filled with anything that you wanted really. You can even make ahead and freeze them ready for a party or impromptu entertaining.


Ingredients

(makes 20)

20 rice paper roll sheets

1 tblsp seseame oil
1/4 cabbage, finely sliced
4 spring onions, finely chopped
1/2 c basil leave
2 large garlic cloves, finely sliced
olive oil spray

Heat over to 180 C and line a baking tray with baking paper.
Heat oil in a wok and toss in cabbage, onions, garlic and basil frying for 3-5 mins until softened and fragrant.
Remove from heat and cool.
Place one of the rice paper sheets in some luke warm water to soften (I usually do this under the tap).
Once softened lay sheet on a plate.
Place a tablespoon amount in the middle of the sheet running the mixture vertically. Fold the bottom of the sheet towards the middle. Next fold the left-side so the crease is at the edge of the filling. Then fold the top down and roll the spring roll to the right.
Repeat method with the rice paper, until all the mixture is used up.
Place rolls on baking tray and spray ever so lightly with olive oil spray.
Bake for 20 mins.
Serve immediately.

Wednesday, July 25, 2012

sprouted wheat berry salad with jerusalem artichokes: raw


This past weekend there was an Organic Food and Living festival on in Sydney.
I hadn’t heard it was on until a couple of days before hand and was glad I had a free day to head down and check it out.

It took us 4.5 hours to make our way around to all the stalls, and by the end I was so inspired.


Lunch was awesome too, we had some spelt vegan pizzas.. me thinks I will be doing my own adaptation soon!


On the way out, I noticed a guy selling a heap of organic fresh produce and seeds, and was immediately drawn in by the Jerusalem Artichokes. One box for $2, SOLD!

I've been meaning to get my hands on this tasty root, however my grocer doesn't seem to stock any.


Natively known as the 'Sunroot' in America (as it is part of the Sunflower family) it is a bit of a nutritional power house. Packed with dietary fibre, anti-oxidants (such as Vitamins C, A, E) and minerals - potassium, iron, and copper. It also contains small levels of valuable B-complex group of vitamins such as folates, pyridoxine, pantothenic acid, riboflavin, and thiamin.

Ingredients

(serves 4)

1 c whole organic Australian wheat, soaked for 24 hours
200g Jerusalem artichokes, shaved/finely sliced
½ c fresh basil leaves
bunch of salad greens, roughly chopped
½ lemon juice
1 tsp lemon rind
2 tsp hemp seed oil

Note: you will need to start this recipe 2-3 days before hand, to allow time for the wheat to sprout.
Drain and rinse the soaked wheat.
Place wheat in a glass jar, covered with a clean muslin/chux cloth fastened with a rubber band.
Store in a cool dry location rinsing the wheat twice a day for 2 days until the wheat starts to sprout.
Do a final rinse and place in a large bowl.
Add all other ingredients and toss well to combine.
Serve.

Friday, July 20, 2012

popped amaranth: how to


I’ve been making my own puffed amaranth for a while now.

Back when Joel and I were in college, he used to work night shift at a cereal factory (Sanitarium). So, each time I start popping amaranth, the house fills with smells of roasted grain and Joel says “what smells like the factory?”. 
That's how I know that I'm doing it right.


I know you can buy puffed amaranth these days, but I find it cheaper and fresher to just whip a batch up for breakfast if I have time.

Amaranth is an ancient 8,000 year old grain that was once a staple in the Aztec diet.
The Amaranth plant is related to Swiss chard, quinoa, beets and spinach and produces thousands of tiny seeds that make up this grain-like ingredient.

Amaranth has so many health benefits for you, low in calories, high in fibre, iron, calcium, magnesium, manganese and phosphorous. As amaranth is gluten-free, it acts as a great alternative to wheat, rye or barley.


How to

Ingredients

Amaranth Seeds

Heat a heavy based saucepan (with a completely sealed lid), on high heat for about 3-5 mins.
Drop a tablespoon amount of amaranth seeds in the pot and place the lid on top.
The seeds should start to pop instantly, like pop-corn.
Tip: I tend to pick up the pot and jiggle it a bit for even heating.
Once the amaranth stops popping, tip out of the contents to cool.
Repeat until you have the desired amount.
3 tblsp of amaranth seeds will make 1 c of popped amaranth.

To eat you can top with milk of your choosing, fruits, nuts and seeds etc. Or, add it to homemade muesli, savoury muffins, muesli bars, crackers or even homemade cereal chocolate (recipe for this to come).