Showing posts with label travelling. Show all posts

Tuesday, August 28, 2012

spiced apple and pear roll-ups


I know, I know, I’ve been a little silent on here. But for good reason as we have been at the snow for the past week.

It was amazing; fresh powder, super drop offs and jumps, absolutely worth the aches and pains. On top of that, it was just so nice to have a holiday with Joel again, even if it wasn’t restful, it is just so nice to be active and creating new memories together.
 

Our time on the slopes was exceptional, however our car started playing up pretty early on in the week and we ended up losing all our radiator fluid in 20mins intervals. We took it to a mechanic who said that the job would take him 8-12 hours to pull the engine apart and find the root of the issue*. As we didn’t have time for this, we decided to keep chugging along with a massive drum of coolant and water in the back of the car for top-ups. Our major stress was always going to be the drive home.
We left the snow at 4pm and made it home by midnight – not a bad effort for a 6.5 hour drive, stopping every 10-20 mins.

*Not to mention the car had been in the shop for 2 months right before we left for the snow. Our timing belt went and we had to replace the engine.


I haven’t had time to really document a new recipe amidst the car issues, washing, unpacking, shopping and work. So I’ve decided to post this snack which I made before we left for the snow.
We had a heap of pears and apples to use up in the refrigerator and what better way to use them all up than making roll-ups. A healthy, easy-pack energy hit for the hill.


Ingredients

(makes 24)

5 large apples (mixed red & green)
5 large pears
1 tsp cinnamon

Roughly chop the apples and pears and place them in a heavy based saucepan with an inch of water.
Simmer until soft, remove from heat and cool.
Add cinnamon, and softened fruit to a blender and whiz until smooth.
Scoop out and spread evenly (1/2 cm thick) on dehydrator trays – approx. 4 trays.
If you don’t have heaps of Teleflex sheets (like me), line the trays with baking paper.
Dehydrate on 40 degrees for 15-20 hours.
While still warm, slice each sheet into 6 portions and roll tightly.
Store in an airtight container for a week or 2.

I was totally having too much fun to take many pictures, so there's a few iPhone shots.

Early morning drive down to the snow, 4am start.

First day up, just stunning.

Joel always looks confused when taking photos.

We had a blizzard day; the most dangerous drive ever. I was just like bumper cars, we luckily came away unscathed.

Yeah, snow!

Friday, August 10, 2012

activated vanilla walnuts


I love productive days.
My hours at work have gone back to normal, which means I was finally able to get on top of the house work. I'm not one to feel comfortable if there are lingering jobs waiting to be done.
But, now, I am at ease.
Tidying, sorting, washing, cleaning, ironing etc - all done! I've got the incense burning, fresh bunch of lilies from the garden and the fire on full blaze.
Not only all that, but I was able to catch a movie with my best friend (whom I love dearly).

So, after a busy day, it's time for a well deserved snack.


I've had these walnuts on to dehydrate for 24 hours, so now is as good a time as any to dig in.

Walnuts are super high in Vitamin E which has been found to significantly protect against heart problems. Also high in calcium, manganese, omega 3, copper, potassium and magnesium; walnuts provide so much of the good anti-oxidants that our bodies thrive on.

To properly engage these nutrients, I have activated these walnuts by first soaking them in water for 12 hours. This enables the nut to come alive again - literally. The enzymes in the nut start to break down as if it were about to grow. In doing this, your body is absorbing pure live nutrients rather than trying to break down the tough nut first. What better way to nourish your body than with living foods.
Even though they have been dehydrated, they are still activated as they have not been dried out too much to become dormant again.


Ingredients

(makes 3 cups)

3 c raw walnuts, soaked for 12 hours
2 tblsp malt extract
2 tsp vanilla extract

Thoroughly combine all ingredients in a large bowl.
Lay out on dehydrator trays and place on 40 C setting (level II for me).
Dehydrate for 24 hours.
Store in an airtight container for up to a week.

Friday, July 27, 2012

rustic protein bars: vegan


We’re off to the snow this weekend for a small taster before our big week on the slopes in August.

Our snow gear has been in storage for 2 years as we missed last year’s season and the one before we were overseas. Digging out our gear was fun, it felt like Christmas again. I was constantly saying ‘Oh, I’d forgotten I had that!’. We hung our jackets and pants on the stairs to get some air, but it only made us more impatient to be at the snow.

So, we’re excited.

Joel is a snow boarder, but I’m a skier from way back. It’s always fun to tease each other on the slopes, as we’ve got totally different styles.


In the mad rush of getting everything together, I wanted to make a healthy and cheap energy hit that we could just take with us on the hill.

Because of the busyness I didn’t spend too long on the pretty-ness of these bars, so they really have that ‘rustic’ look.

I know they look rough, BUT, they are ever so yum and will do the trick for our protein and energy hits.

Ingredients

(makes 16)

Dry
1 c rolled oats
½ c coconut flakes
¼ c protein powder (I’ve used hemp seed protein)
½ c dried/dehydrated fruit (I recently dehydrated some fresh cranberries and gooseberries – took 12 hours)
¼ c pine nuts

Wet
¼ c agave syrup
¼ c unhulled tahini
2 tblsp coconut butter
½ c water


Heat oven to 130 C and line a loaf/slice tin with baking paper.

Combine dry ingredients in a large bowl.
Heat the wet ingredients in a small pot over the stove until tahini is well integrated.
Pour the wet ingredients over the dry and stir well to combine.
Spoon mixture into the lined tray and press mixture firmly down.
Place in oven and cook for 45 minutes to an hour.
Cool completely before slicing.
Can store in the refrigerator for up to 2 weeks or freeze pulling them out as required.

Friday, May 18, 2012

fresh homemade tofu


Late last year we drove across the country to visit my brother and sister-in-law who live in Esperance.
It's a gorgeous little town on the southern coast of Western Australia with Australia's whitest beaches and bluest oceans.


A one way trip took us 36 hours of driving, broken up into 3 days.

It's not about the destination, but the journey. The drive was very therapeutic and we got to chatter away about life and dreams - not to mentioned tore our way through a couple of audio books.

One of which was 'Under the Dome' by Stephen King.
Not the most comforting author to be listening to when your out camping in the middle of the dessert!


Anyways, enough of that.

While we were in Esperance, I insisted that we visit the local health food store.

While browsing the shelves, Joel discovered this 'Tofu Making Kit'. 
As a huge advocate for making everything from scratch, I just HAD to get it.

Funnily enough, the lady at the counter explained that it was her family who made the Nigari from the local Lake Crystal, Pink Lake.

What came in the kit was a mould, muslin cloth and Nigari.
Nigari is Magnesium Oil. Essential to life, magnesium is crucial for optimum health and vitality.


This recipe calls for the Nigari, but if you don't have any or you can't get your hands on it, ask your local health food store if they have any Magnesium Oil - it should do the same thing.

Homemade tofu is unlike anything I have tasted before.
It's delicious and so smooth!

Makes me wonder what they put in the store bought kind, that makes it taste so different.

This recipe first explains how to make soy milk from the soy beans (no Nigari required for this), then how to make the tofu from the milk.


Utensils

kettle
blender
heavy based saucepan with lid (medium-large)
mould (can use an old container with holes poked through)
muslin cloth (or new chux cloth)
strainer/colander
jug
large bowl
wooden spoon
slotted spoon

Ingredients

(approximately 450g)

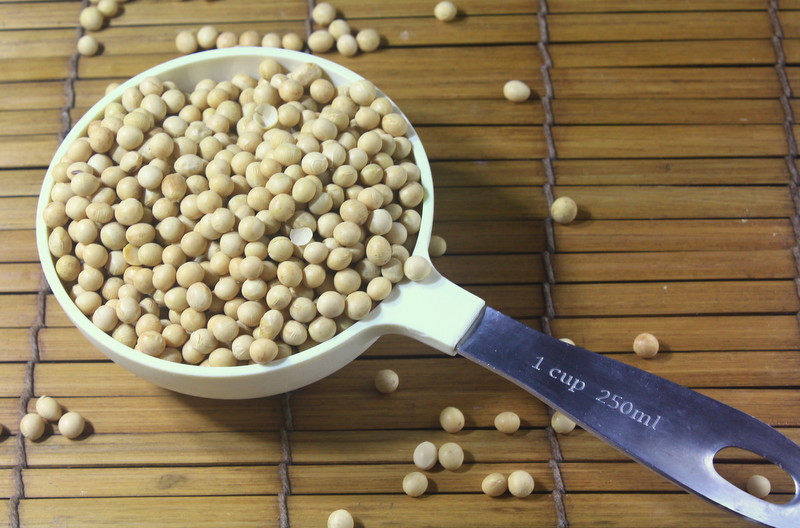
1 c soy beans
15 ml Nigari (for firm tofu, use less for silken)
water

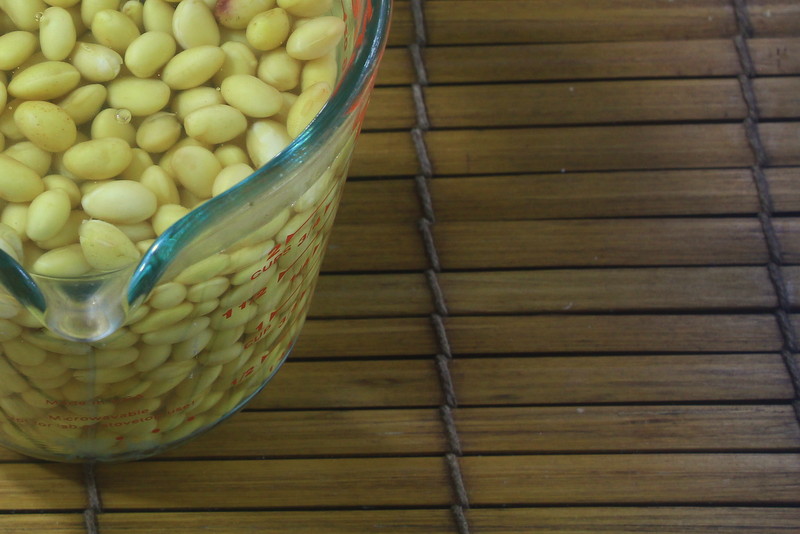
Start off by soaking a cup of soy beans for 8-12 hours.


Once soaked, you end up with about two cups of beans.
Drain and place in a blender with 3 cups of boiling water.
Blend for 1-2 minutes until you have a smooth paste.
Pour the contents of the blender into a heavy based saucepan.
Add 4 cups of boiling water and bring to the boil.
Once at boiling point, remove from stove.


Strain the contents of the pot through a moist muslin cloth lined colander/strainer, into a jug.
(Tip: The mixture will be hot, so use kitchen gloves at this point).
Squeeze all the moisture out of the muslin cloth.

At this stage you have 2 things:

*Okara - soy bean fibre (not required for the rest of the recipe)
1 1/2 L Soy Milk - you can stop here if you're just after soy milk

*Most people discard this, but Okara is full of nutritional properties and can be used in other recipes where flour or binding ingredients are required.
I will be posting an Okara recipe as my next post, so stay tuned.
Store the Okara in the refrigerator for up to 3 days.


Taking the soy milk, pour contents back into the saucepan (ensuring the pot has been cleaned).
Bring to the boil and simmer for 7 minutes.
Combine the Nigari with 1/2 c of boiling water and mix well.

Remove the pot from the stove and using the wooden spoon stir the milk from side-to-side (6-8 times) while drizzling 1/3 of the Nigari mixture into the pot.
Remove the spoon and drizzle over another 1/3 of the Nigari.
Cover the pot and stand for 5 mins.
Curds will start to appear on the top of the mixture.
While lightly stirring the top 1/2 inch of the mixture, drizzle over the final 1/3 of the Nigari.
Cover and stand for a further 5 mins.

Line the mould with cleaned muslin cloth and sit in a colander over a bowl.

Using a slotted spoon, spoon out the curds into the mould.


Fold the muslin cloth over the top of the curds and press a weight on top (or a plate if using alternative).
Let the moisture drain out of it (4-5 mins).


Next, place the mould in a bowl of iced water for 5 minutes while it firms up.


Remove tofu from the mould and serve fresh in your favourite dish.

If you are wanting to keep the tofu for longer, you will need to place it in a bowl of water, cover and store in the refrigerator - replacing the water daily.
Will keep for up to 3 days.

Sorry about the marathon post! xo

Tuesday, May 15, 2012

raw protein energy balls

This past weekend we spent canyoning.
It was so much fun! But just a little chilly.

This recipe is something that I whipped up last week to take with us.

High protein energy hits.


It’s just what we needed while tackling the uphill climbs, 25m waterfall abseils, giant boulders and not to mention the last three hours of hiking and navigating in the dark.

I will definitely be making these again! Especially for the snow skiing later in the year.


While I was making these, I just kept adding bits and pieces that I know would be super nourishing for our bodies and was so surprised when rolling the balls that the mixture turned out to make 40!

I think I'll be freezing half the batch for a quick snacks at a later date.


Ingredients

(makes 40)

2 c triticle flakes, soaked for 12 hours and drained
1/2 c dried dates, soaked for 12 hours and drained
1/2 c raw peanuts + extra
1/4 c shredded coconut + extra
2 tblsp chia seeds
1 tblsp raw super food powder*
2 tblsp raw protein powder
1/4 c dried cranberries
1/4 c almond butter
3 tblsp agave syrup
1/4 c raisins
10 drops stevia

Combine all ingredients in a food processor and process until well combined - should resemble a sticky dough-like consistency.

In a mortar and pestle combine the extra coconut and peanuts (you could also add a pinch of vanilla salt).
Grind until the peanuts a broken into pieces.

Scoop out tablespoon size portions of the processed mixture and using wet hands, roll into balls.
Then roll the balls in the coconut and peanut mixture and set in the refrigerator over night.

You can store in an airtight container in the refrigerator for up to a week, or freeze for later consumption.

*I use a super food powder that is a mix of the top 15 super foods (known) of the world.


Unfortunately I didn’t get the camera out for the abseils or the glow worm tunnel, but here’s a couple of snap shots.

Morning view of the mountains.

Cooking up our oats for breakfast.

Ice on the tent. Brrr.

View from the first cliff climb.

Morning tea with our energy balls.

Last bit of sunlight for the afternoon.

Sunday, April 22, 2012

dehydrated fruit salad

The newest toy in my kitchen is the dehydrator.

I've only had it for a couple of months now, but I'm having fun experimenting with raw treats.

This post isn't really a recipe, just me sharing with you the dehydration of fruit.


I splashed out to get this because I wanted to be able to take healthy snacks and meals with us when we go hiking and camping.

Also, with the whole 'raw foods' movement - dehydration still keeps foods raw, but with that cooked feel.

If you are planning on getting a dehydrator, let me just say - it's not a quick process.
Dehydrating anything can take up to a day or two, depending on the water content of the item.
So if you are planning meals ahead - it's brilliant.


Most weekends I run the dehydrator mainly because we're barely home.
We live in an open barn and even though the machine isn't too loud, it still is a constant fan noise.
The best thing is, you can just leave the dehydrator on all day and night and not worry about the foods burning.

After coming home from the markets, I slice up a heap of fruit (about 2 cm thick) and arrange them in a single layer on the drying racks and dehydrate on the fruit setting.
This fruit salad consists of pineapple, kiwi fruit, papaw and plums.
Each fruit takes a unique drying time.
I've noticed that the kiwi fruit and plums dried in a similar time, 14 hours. 
While the papaw and pineapple took about 18 hours.


Let me know if you have a dehydrator and what you use it for.

xo