Showing posts with label coconut. Show all posts

Saturday, September 29, 2012

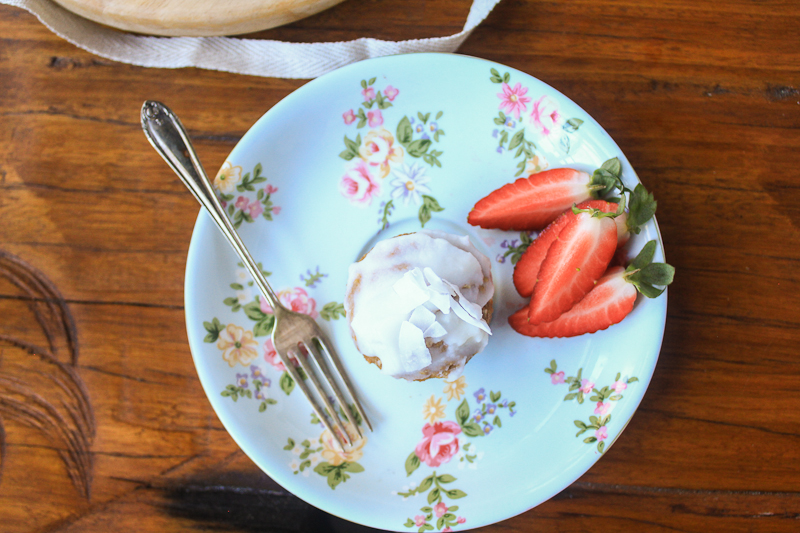
carrot cake muffins


Hooray, the days are reaching summer proportions. It felt like the coldest winter ever, but we seem to be on the other side of it now and I'm looking forward to spending time at the beach.

Anyway, to celebrate the dramatic weather change, I decided to do some baking. I know, crazy.. why would you turn the oven on in 30C+ weather? Because I wanted some carrot cake, that's why.


I whipped these up, left them to cool then took a plate to my parents place to share. Because what better way to celebrate (and test) than to share. 

Mum said that the muffin was delicious. She even closed her eyes as she ate saying 'you better make sure you put in your blog that your mum loved these'. Done!

Dad said there's a real 'wang' to the icing before the coconut kicks in and that he loved the cake.

I told Joel what Dad said, and he started saying it. Great, now the word wang was being thrown around in reference to my muffins. Nice. Still, it didn't spoil the beauty of them!


Ingredients

(makes 12)

Cake
3 carrots, grated
1 c plain wholemeal flour
1 tsp bi-carb soda
1/4 c raisins
1/4 c walnuts, slightly crushed
1 tsp mixed spice
2 eggs, lightly whisked
1/4 c water
2 tblsp sugar
1/4 c coconut oil

'Icing'
2 tblsp creamed coconut, warmed
2 tsp water
1/2 lime, grated rind and juice
1 tsp agave syrup

Heat oven to 160C and line a muffin tray.
Combine all ingredients for the cake in a large bowl and mix until well combined.
Spoon a tablespoon size amount into each muffin hole in the tray.
Place in oven for 20-30 minutes until cake springs back to the touch.
Remove and cool entirely.

Assembly
Combine all ingredients for the icing in a small bowl until well combined.
Using a butter knife, spread the mixture over the cooled muffins.
Enjoy!


Wednesday, September 5, 2012

dairy-free lamingtons


Lamingtons were a childhood favourite of mine.

They are one of my first baked treats that really worked out well for me, every time. From about the age of 13/14 I loved being in the kitchen baking. I have fond memories of hanging out on the bench helping mum while we made ANZAC cookies.
When I got the gist of baking on my own, most afternoons after school I would be straight into the kitchen and browse through my favourite cookbook of all time – Woman's Weekly ‘Sweet Old Fashioned Favourites’. The go-tos would be: Devil’s Food Cake, Vanilla Slice, Coconut Ice, ANZAC Cookies and of course Lamingtons.


Now that I am older and my tastes have changed, I find myself baking less and less. But I was feeling nostalgic and decided to come up with a dairy-free, low-gi option for one of my all-time favourite homemade bakes.

I was amazed at how similar to the old version these were! The main difference was the coconut sugar in the sponge as it added a deeper rich caramel flavour. Yum!


Ingredients

(makes 12)

Sponge
3 eggs
1/2 c coconut sugar
1/2 c self raising flour
1/2 tsp bi-carb soda

Icing
1/2 c cocoa powder
1/4 c agave syrup
1/8 tsp stevia powder
1 tblsp cocoa butter
1 tblsp creamed coconut or coconut oil
1 vanilla bean, scraped
1/4 c water
tiny pinch of salt

chipped coconut

Sponge
Heat oven to 150 degrees and line a 9"x12" baking dish with baking paper.
Beat eggs in a medium bowl until thick and creamy.
Slowly add coconut sugar until well dissolved.
Next, slowly fold through sifted self-raising flour and bi-carb soda.
Pour mixture into the dish and bake in oven for 20 mins.
Remove from oven and cool completely.

Icing
Bring a saucepan to boil, half filled with water.
Next combine all ingredients for the 'icing' in a small bowl and stir constantly over the boiling water until butter is melted.

Assembly
Slice sponge into small squares.
Dip each square into 'icing' then roll into the chipped coconut and place on a plate.
Repeat the process for all the squares and place the plate in the refrigerator to cool.
Store in an airtight container in the refrigerator for up to a week.

Wednesday, August 15, 2012

orange soup


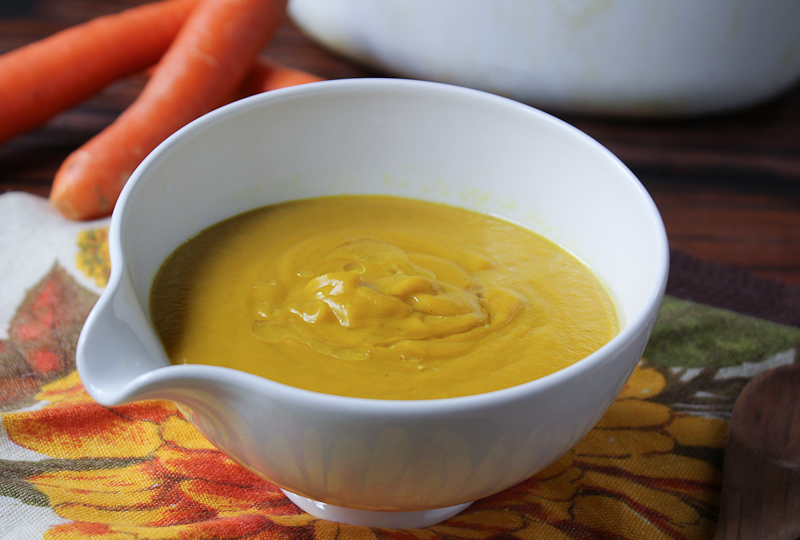
I am calling this one my 'orange' soup because of the intense rich colour of the ingredients I've used.

Orange foods are high in carotenoids, which have been shown to decrease the risk of cancers, such as; lung, colon, bladder, cervical, breast and skin. Carotenoid consumption also protects against the risk of macular degeneration and cataracts - which is where the old wives tale comes in, that eating carrots will make you see in the dark.
Orange coloured foods help cleanse the body of toxins and stresses. Vitamin C and zinc work together to provide an excellent detoxifying combination helping the body rid itself of heavy metals and other pollutants.

Also high in Vitamins A, C and minerals such as calcium, copper, selenium, zinc - orange foods are a 'must' in your diet.


I made such a large amount of this soup so that I could freeze individual portions to take for lunch at work.

It has been delightfully satisfying and warming over the past week, as we've had a bitter cold snap - I really don't mind, because it means more snow!


Ingredients

(makes 6-8 serves)

2 kg carrots, roughly chopped (skin on)
2 leeks, roughly sliced
2 brown onions, peeled and roughly chopped
2 c pumpkin, cubed (skin off)
1 kumera, roughly chopped (skin on)
1 tsp turmeric, ground
1 tsp cinnamon, ground
1 tsp curry powder

2 tblsp creamed coconut

coconut oil and salt to taste

Place all ingredients except for the creamed coconut, in a large heavy based pot.
Add enough water to cover the vegetables by an inch - bring to the boil.
Reduce heat and simmer for 30 mins until vegetables are soft (ie. you can poke a knife easily through).
Turn off heat and stir through creamed coconut.
When cool enough, transfer contents to a blender and process until smooth (you may need to do this in batches).
Return to pot and reheat, adding salt to taste.
Serve and drizzle with a small amount of coconut oil.


Monday, July 23, 2012

homemade chocolate with amaranth: vegan, low-gi


Homemade chocolate isn’t as difficult as you think it is. If you have all the ingredients available to you, it should take no more than 5 minutes.

Finding vegan chocolate is getting easier, but it’s still a bit of a challenge. Coupled with my love of making things from scratch, creating my own chocolate is a must.

Being the control freak that I am, I like to be able to tailor make my food to my tasting. If you haven’t been able to tell by now, I like to keep my desserts low-gi and not overly sweet.


I added a bit of coconut butter/oil to the recipe to stretch out the cocoa butter; this is where the mass producers would add in milk products.

I know cocoa butter is a bit dear, but it’s well worth the purchase. And a little bit goes a long way.

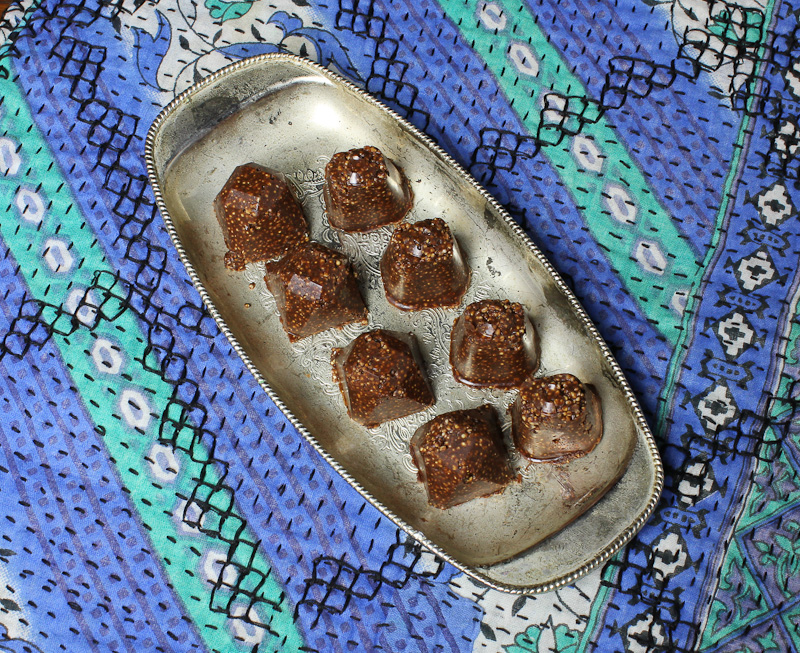
I’ve used the popped amaranth from my previous post to bulk out the chocolate, resulting in a bit of a ‘chocolate crackle’ adaptation.

This recipe turned out really tasty! Even Joel, who loves his ‘normal’ chocolate, was way on board devouring 4 portions in one sitting.
It’s sweetened just enough to offset the vanilla salt and with the roasted amaranth – yummm..

Other than the popped amaranth, this recipe is raw.


Don’t expect to be eating commercial chocolate when you nibble on a bit of this. I feel my this recipe is taking chocolate back to the raw basics and celebrating what makes chocolate real.

Ingredients

(makes 40)

1/4 c raw cocoa butter
1 tblsp coconut oil
1 tblsp creamed coconut

1/4 raw lucuma powder
3 tblsp raw cocoa

1 tblsp agave nectar
1 tsp vanilla extract
20 drops stevia (add more for desired sweetness)
1 vanilla bean, seeds
1/4 tsp vanilla salt

Melt cocoa butter, coconut oil and creamed coconut over warm water.
Meanwhile, combine amaranth, lucuma and cocoa powder in a bowl, mix together and create a well in the middle.
In the well pour remaining ingredients and slowly add the melted oils.
Stir thoroughly until all combined and spoon 2 tsp amounts into chocolate moulds or ice cube trays.
Set in the refrigerator to set for a couple of hours.
Then you should be ready to enjoy!
Store in the refrigerator for a couple of weeks.


Monday, July 16, 2012

chia delight

This is my go-to breakfast; especially on a Monday morning.

No one likes to end a beautiful weekend to go back to work.


So, when I know that I won't have much time in the morning (on account of the snooze button), this is my go-to healthy breakfast.

The night before I put together the following ingredients so it's ready to go as I dash out the door.


I love the way it sets and becomes almost pudding-like.

Chia seeds can soak up to 10 times the amount of its body weight (which can be great for hydration during exercise).

After eating, the nutrients travel to the cells very quickly due to the ease in digestion and assimilation.  Use them when you want to build or regenerate healthy body tissue.


High in fibre, omega 3's and protein, this Aztec super food keeps me going all morning.


My ch-ch-ch-chia breakfasts vary each morning - as to the different fruits, nut butters and kefir water/milk available to me.

This recipe outlines my most basic of recipes and is the foundation of my chia delights.


Ingredients

(makes 1)

1 1/2 tblsp black chia seeds
1 c coconut kefir milk (or any liquid/milk of choosing)
fruit, seeds and nut butters

Combine chia seeds and coconut kefir together, whisk well.
Set aside for at least 10 minutes, or place in refrigerator overnight until set.
Top with desired fruit, nuts/seeds and enjoy.


Good morning sleepy heads! xo

Wednesday, July 11, 2012

coconut & elderflower mini muffins with creamed coconut: vegan, low-gi


We had a Princess party over the weekend for our friends 2 daughters.

When asking what I could bring, it was suggested that I bake a dairy-free cake.
If I ever make anything sweet, it's always low-gi. I only have low-gi sweeteners at home so it means I get to be creative.

But my biggest dilemma is what cake to make when your not a sweet tooth.


Hmm, coconut always goes down well - right?!

Not to mention my best friend took me out to an amazing local organic health store last week where I picked up some creamed coconut. This stuff is dangerously, unbelievably, insanely delicious. And the store.. well.. I'll be back.

But, what else to go in my mini muffins..

Swinging on the refrigerator door staring into the ice box, I was hoping something would jump out at me. Eventually I noticed my Elderflower concentrate.
I bought it ages ago, but not really being into cordials, it's just been sitting there.
Ding ding - add it to the coconut muffins for a refreshing floral kick.


Ingredients

(makes 24)

3 tblsp 'No Egg', egg replacer*
1 c water

Dry
1 c wholemeal spelt flour
1 c finely desiccated coconut
1 tsp bi-carb soda
1/4 lucuma powder
1/4 coconut sugar
1/3 mesquite powder

Wet
1 tsp vanilla extract
10 drops of stevia
2 tblsp coconut oil
2 tblsp Elderflower concentrate

creamed coconut
coconut chips

Heat oven to 150 C and spray a mini muffin tin with oil.
Whisk egg replacer and water together in a small jug, set aside.
Mix all dry ingredients in a large bowl, make a well.
Pour all wet items into the well, along with the 'egg' mixture.
In a circular motion, stir the ingredients until well combined.
Spoon 1-2 tblsp of the batter into the muffin holes.
Bake for 10-15 mins.
Turn onto cooling rack to cool completely.
Using a butter knife, spread 1 tsp of warmed creamed coconut over the muffins and sprinkle with coconut chips.
Place in refrigerator to cool - for at least 10 mins.

*If you didn't want to use egg replacer, you could use 3 eggs instead of the replacer and water.


I thought this would be a fitting post to put up, seeing tomorrow will be my birthday and what better way than to celebrate with cake!

xo

Friday, July 6, 2012

vegan fudge brownies - low-gi

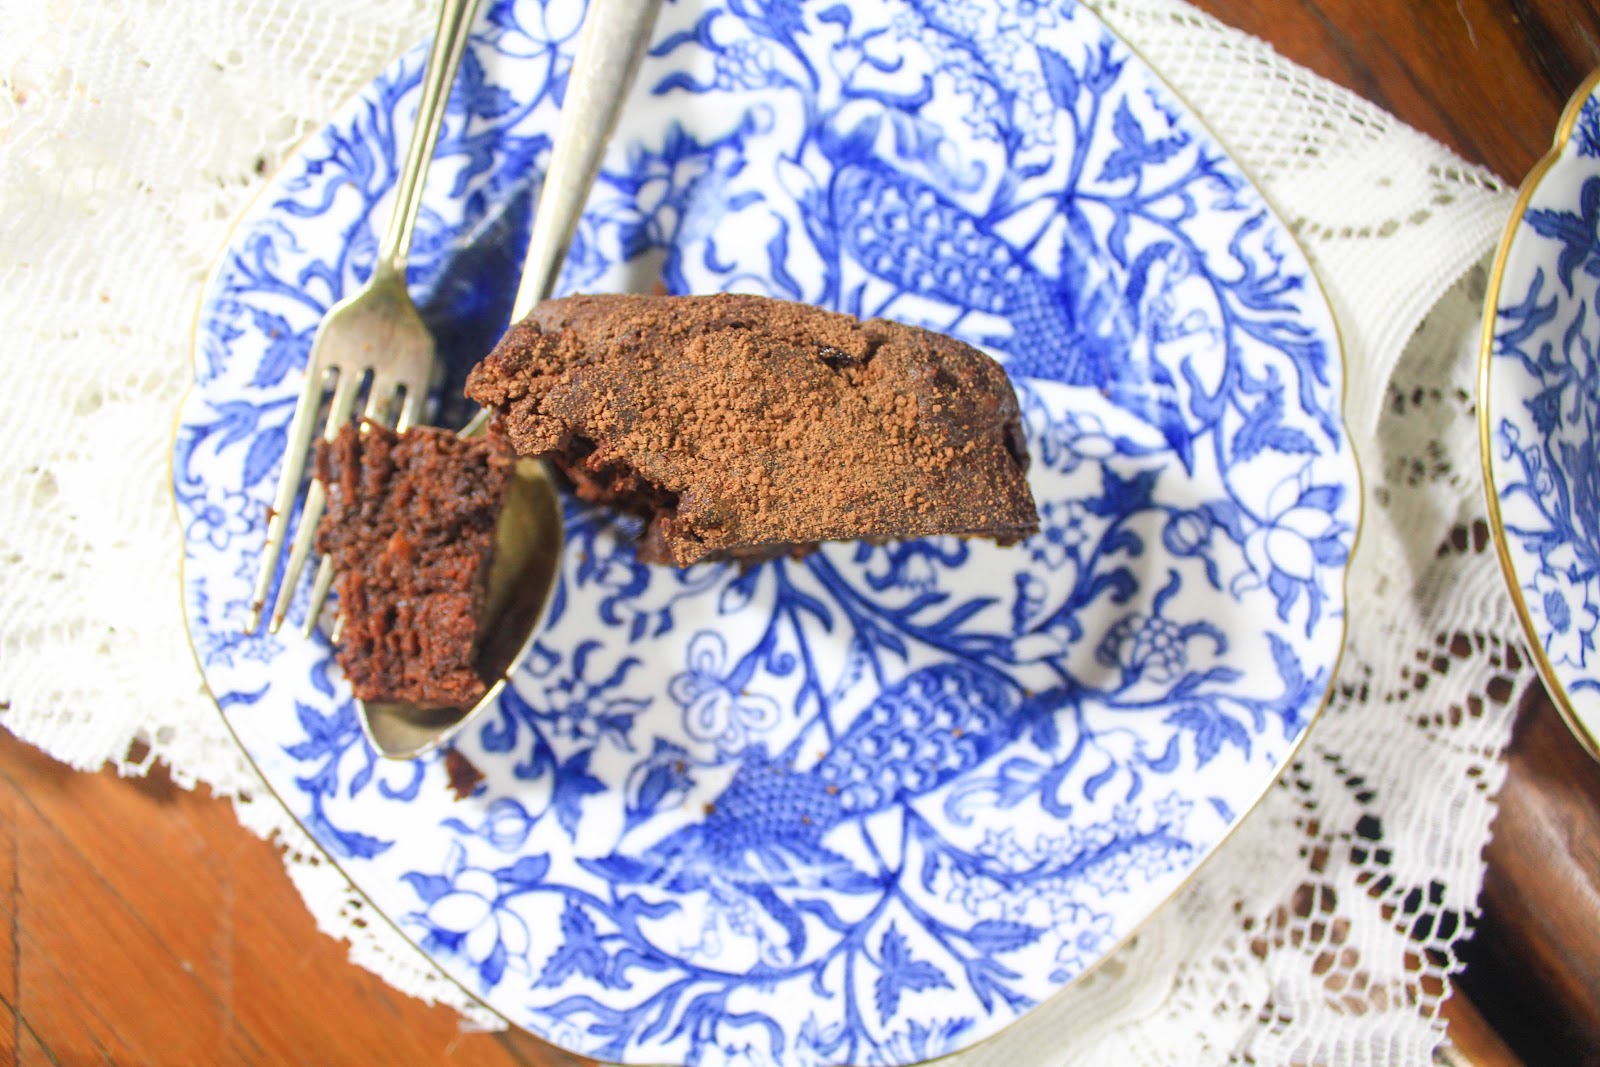
Joel absolutely loves brownies – if made well and gooey.
I attempted build some for him a while back, but they didn’t quite turn out the way I’d hoped.
Round two and OH MY GOODNESS – amazing.


Not too sweet, rich and gooey, low-gi, grain-free, packed with healthy oils and best of all vegan!
Ordinarily I would have used eggs to bind the mixture together, but a few weeks back I picked up ‘No-Egg’, a gluten and dairy free egg replacer. Unopened and wanting to keep these brownies vegan, I decided to incorporate the egg replacement into the recipe. I was skeptical at first, but was pleasantly surprised with the result.


I love hiding vegetables and fruit in baked goods, it keeps the meal healthier, lower in fat and higher in fibre.
Not to mention, Joel does not like beetroot - like, at all. I’ve tried everything for him to eat this vegetable, but he is no fan. So, I hid a large beetroot in the mixture and he didn’t seem to notice! Score one for my sneaky beetroot endeavours.

I’ve also used Lucuma powder in this recipe to keep it nice and low-gi as this Peruvian health food has a super low gi index of 25.

Lucuma also contains 14 essential trace elements, including a considerable amount of potassium, sodium, calcium, magnesium, iron, beta-carotene, niacin and phosphorus. Phosphorus is important for bone and protein formation, digestion and hormone balance.

There are also studies to indicate that lucuma may have anti-inflammatory, anti-aging and skin-repair effects on human skin.

Ingredients

(makes 12+)

1 large beetroot, roughly chopped
1 large red apple, roughly chopped
¼ c water

Dry
2 c shredded coconut, pulsed in blender/processor until powdered
½ - ¾ c raw cocoa powder (depending on how rich you like your chocolate)
½ c mesquite powder
½ c lucuma powder
½ c coconut sugar
2 tsp bi-carb soda
40g vegan dark chocolate
pinch of vanilla salt

Wet
3 tblsp No-Egg, mixed in ¼ c water
½ - 1 tsp stevia (depending on sweetness)
1 tblsp vanilla extract
¼ c coconut oil
¼ c cocoa butter, melted

Heat oven to 180 C and line a 6” x 12” porcelain dish or brownie tin, with baking paper.
Place apple and beetroot along with water in a large pot – cook through until soft.
Cool, then empty contents into a food processor/blender and whiz until pureed.
Separately combine all dry ingredients in a large bowl and create a well in the middle.
In the well, pour in the wet ingredients along with the puree.
Stir in a rotational movement until well combined.
Scoop batter into the baking dish and place in oven for 40 mins – or until skewer is inserted and comes out clean.
Cool (if you can wait) and enjoy.


With just the two of us at home, we won’t get through these brownies in a couple of days, so I will be storing them in the freezer. Just pull them out to thaw about 1 hour before you’re ready to eat, good as new.

Sometimes, when that chocolate craving comes around, it’s good to have something on hand.

Tuesday, June 26, 2012

sour orange and fresh coconut sauce


The other day when coming home, we pulled into our street to see two of our little neighbours holding up "oranges, lemons, mandarines - for sale".

They were so cute! I think that was their main marketing strategy.


The two girls had a little table set up at the start of the road, trying to catch customers.

I HAD to stop.

They'd gone out earlier that day and picked some fresh citrus fruit from their orchard.

I ended up with $4 worth of goods (2 kg oranges, 5 lemons, 5 sour oranges). As a tip I gave each of the a $2 coin for being so adorable, they were so happy.


This sauce is super versatile - you could use it as a sweet, kind of like a lemon curd, or you can add it to some grilled tempeh/tofu steaks. We ended up eating it with some steamed blue-eye cod.

Ingredients

(makes 400mL)

2 sour oranges, peeled and de-pitted
1 c young coconut flesh
a pinch of vanilla salt

Combine all ingredients in a blender/food processor and whiz until thick and creamy.


Serve.