Showing posts with label gluten-free. Show all posts

Saturday, November 3, 2012

orange almond cake


Finally on the mend and back at work with only a lingering cough. Being sick is just the worst, and I was definitely very miserable.

Feeling better means I'm back in the kitchen but still feeling like something pretty simple and basic, I whipped up this orange almond cake. I can't take any credit for the recipe as I picked it up in a cookbook somewhere, the name and place evades me.


I found this cake to be just so moist and flavoursome, holding its form perfectly even with no flour. I shared with my family who was also surprised at the moistness of the cake.

I didn't have almond meal, but had plenty of almonds on hand, so I processed 200 g in the food processor until fine.


Ingredients

(serves 8-10)

2 oranges
1 1/2 c almond meal (or 200g almonds ground)
6 eggs, lightly whisked
1 tsp bi-carb soda
1/2 c raw sugar

Heat oven to 160 C and line a spring form cake dish with baking paper
Place oranges in a pot and bring to the boil.
Simmer for 45 minutes, drain and cool.
Place in a food processor and blend until smooth.
Fold in almond meal, eggs, sugar and bi-carb gently.
Pour mixture into the tin and place in oven to bake for 45-50 minutes (until firm).
Remove from oven and cool.
Serve and enjoy.

Wednesday, October 3, 2012

vegan risotto with truffle oil


You may not realise it, but I love any excuse to add truffle to a meal. I usually add it to a mushroom based dish and this one was not going to get away without a drizzle or two.

It’s such a whole sensory experience that compares to none other. When you sit down to a meal and smell the truffle, it’s like your first kiss, every time. Your heart skips a beat and you can’t wait to dig in, but you want to take it slow and savour every moment. What an analogy huh!


Risotto is an awesome one pot meal to spare you that laborious task of washing up too much. Adding to that beautiful experience.

I don’t know about you, but usually I find myself using heaps of pots and baking dishes when preparing dinner. It’s not so bad because I wash as I go – we’ve got a pretty tight kitchen so bench space is hard to come by. Actually, if I think about it, every night the dishes (bar the ones we eat on) are all washed up and stacked before we sit down to eat. Joel likes that because he is always on washing up duty but there is rarely much to do.


Ingredients

(serves 4)

1 tblsp olive oil
1 brown onion, finely sliced
200g button mushrooms, finely sliced
1 c arborio rice (risotto rice)
2 ½ c water
1 bunch asparagus, sliced into 1cm rounds
1 c peas, frozen or fresh
salt and pepper to taste
Optional: Tartufo Bianco (white truffle oil)

Heat oil in a heavy based saucepan, add onion and stir until softened.
Next add mushrooms and stir fry for approximately 5 minutes.
Add rice and mix for a further 2 minutes.
Then add 1 c of water to the pan and simmer until water has been absorbed, stirring minimally.
Next mix in the asparagus and add the remaining water.
Cover saucepan to cook through, approximately 15 minutes.
Finally add the peas stirring the risotto until the peas are cooked.
Season with salt and pepper, drizzle with truffle oil and serve.


Thursday, September 27, 2012

vegetable quiche


This is just a quick and easy recipe (bar the cooking time), that you can whip together in no time and leave in the oven to cook away.

I've used a variety of vegetables in this because it's so important to keep your diet varied with the vegetables and grains that you use. Each have a unique makeup of vitamins and minerals, so it really is vital that you vary what you eat so that you can get all the beneficial nutrition. If there is a vegie that you haven't heard of before, maybe consider trying it, if you're not sure ask around to see how others add it into their diet.


This recipe made enough to feed a family, but, with just the two of us at home we had a few leftovers. Making meals that are a little bigger is great for a quick lunch the next day or a meal stored in the freezer. This recipe is certainly no exception as it made the perfect healthy lunch for the next day, both cold and warmed up.


Ingredients

(makes 8-10 slices)

4 zucchinis, grated
2 potatoes, grated
3 carrots, grated
2 brown onions, grated
4 eggs, whisked
100g goats cheese, crumbled
¼ c nutritional yeast flakes
salt and pepper to taste

Heat oven to 150 C and grease a medium baking dish with olive oil.
Combine all ingredients well and press into dish.
Bake in oven for 1-1 ½ hours.
Remove from oven, cool for 5 minutes and serve.


Monday, September 17, 2012

red lentil burgers


Is life just busier? I feel the days are going faster than ever and any spare time that I have gets filled up pretty quickly. I don't mind though, I love fitting as much into life as possible that's just living, right?!

After a busy weekend and a full day at work I came home, chopped the fire wood, started the fire, then got started on these beauties.

Luckily there were heaps more burgers than I anticipated which means I can stock the freezer for a quick lunch option on work days. Sometimes with all the rushing, it's good to have a healthy back-up meal that you can defrost for a quick satisfying lunch or dinner and this is surely one.


Ingredients

(makes 20)

1 1/2 c split red lentils, soaked for 6-8 hours

1 c walnuts
2 carrots, grated
1 brown onion, grated

1 c besan flour
1 tsp bi-carb soda
1 tblsp savoury yeast flakes
2 eggs, lightly whisked

olive oil, for greasing
salt and pepper, to taste

Heat oven to 180 C and line a large baking tray with parchment paper then lightly grease with oil.
Bring lentils to boil in a heavy based saucepan.
Cook for 15-20 minutes until soft, then drain and set aside to cool.
Add walnuts to a food processor/blender and pulse until crumbled.
Mix walnuts, carrots and onion in a medium sized bowl.
Next add in the lentils and remainder of ingredients, mixing until well combined.
Using wet hands, scoop small handful sizes of the mixture then roll into a ball.
Place on tray and push down lightly to flatten out.
Repeat until all the mixture has been used.
Place tray in oven for 25 minutes, then flip the burgers and bake for a further 15 minutes.
Serve!

Wednesday, September 12, 2012

herbed chickpea salad


Absolutely love chickpeas and it has been too long between friends.

Like, seriously, way too long. I even expressed to Joel how excited I was to be having chickpeas for dinner. He sarcastically responded by saying, ‘that’s great honey’.


As you may have read in the last post, we did a whole lot of gardening on the weekend and I had to harvest all my herbs. I don’t really like using up all my crops as I feel safer with still some sitting there. It’s like, but what if I want some fresh mint later in the week? What will I do then! I even get a little precious and won’t use as much as I like, just so there is always something filling the pots. It makes me feel wealthy in a very green way.

Anyways, with the massive influx of herbs in my kitchen, I have been throwing them into everything. Handfuls of mint in some mineral water, chives in my cabbage wraps for lunch, parsley on EVERYTHING.

Chickpeas are so tasty and make an awesome protein packed ‘throw together’ salad-like meal. And best of all, they are inexpensive. Joel and I lived off legumes when we travelled Europe. They were the most filling, affordable meal addition for us vegetarians/pescatarians, on a very tight budget. 30 Euro cents (40c in Aus) would get you a 500g jar of pre-prepared beans, peas, lentils etc and would easily stretch 2 meals each.

You can get super creative with chickpea salads. I’ve just thrown in whatever I felt like when digging through the refrigerator, but any fresh vegetables will work.


Ingredients

(makes 4 serves)

1 ½ c dried chickpeas, soaked for 6-8 hours (or 2 drained and rinsed tins)
1 spanish red onion, finely diced
1 cucumber, diced
½ c of complimentary fresh herbs (mint, chives, parsley etc)
½ lime juice
salt and pepper to taste

If you are using dried chickpeas, place them in a pot of water and bring to the boil.
Simmer for 20-30 minutes.
Drain and set aside to cool.

Add all ingredients in a medium bowl and toss well to combine.
Place in refrigerator for 30 minutes - 1 hour for flavours to infuse.
Serve and enjoy.


Friday, August 17, 2012

walnut, chia and rhubarb cookies

I’ve been utilising the dehydrator a bit more lately, can you tell?

This time is a fruity healthy cookie cracker. Gluten-free, grain-free, dairy-free, vegan, no added sugar, low-gi, mostly raw.. they are the perfect on-the-go snack.


Joel says they are more like fruit crackers than cookies. But I think he had greasy, buttery cookies on his mind when I produced these for him to try.
His verdict: they are really tasty, but you spend the next couple of minutes picking chia seeds out of your teeth.
I know this would bother him, because, Joel is a minimal effort kind of guy when it comes to food. He won’t eat muesli because it takes too long to chew. Yep, he is a different sort.

These ‘cookies’ (and I use the term loosely) are an impromptu idea I had to use up a bunch of rhubarb that was sitting in the refrigerator.

What?! Use up rhubarb! Like it is some kind of space waster.
It is not like that at all. Honest.

I love rhubarb, but because we are leaving in a couple of days for the snow (for a week) and I couldn’t justify baking it into something that would not keep – or that doesn’t travel well.

Alas! Dehydration.


Ingredients

(makes 20+)

1/4 c chia seeds
1 1/2 c water

1 bunch rhubard, chopped into inch long lengths
1 tblsp water

1 c walnuts, soaked for 12 hours and drained

2 bananas, mashed
1 tsp cinnamon, ground
1 tsp vanilla extract

Mix chia seeds and water and set aside for 20 mins so the seeds can activate.
Next, place rhubarb and water in a small pot and heat until the fruit is soft.
Remove from heat and cool.
Empty walnuts into a food processor and blend until smooth and creamy.
Next add the bananas, cinnamon, vanilla and rhubarb to the walnut mixture and process until well combined.
Then, gently fold through the chia seeds.
Line dehydrating trays with parchment or teleflex sheets.
Place a cookie cutter on the tray and spoon in 2 tblsp sized portions - or whatever will fit.
Gently remove the cookie cutter and repeat until the mixture is all used up.
Dehydrate on 40 C for 20 hours.


Monday, August 13, 2012

fresh pea citrus salad


Fresh peas will forever take me back to my childhood.

My Grandfather has always had a vegetable garden, even now when he is in his mid-eighties he is growing turmeric, ginger, squash, kohlrabi, passion fruit, tomatoes.. and the list goes on.

When I was younger, I would always raid his fresh pea vine.
Seriously, whenever we visited I would strip the plant of all it's juicy peas and devour them on the spot. Slowly making my way along the fence that the vine grew, I was like a pacman.


Not much has changed since childhood though.

Because whenever I visit now, I ask Granddad to take me straight to his garden and show me what he's been growing - although, I don't eat anything without permission these days.

But, if I'm super lucky, he'll pack me up some of his treats and send me on my way.


Ingredients

(makes a side for 2)

1/2 c fresh peas, shelled
1/2 c snow peas, diagonally sliced
1/2 lemon, juiced
1 tsp lime rind, finely grated
5 basil leaves, finely sliced
2 tsp olive oil

Combine all ingredients in a bowl and toss well.
Serve.


Friday, August 10, 2012

activated vanilla walnuts


I love productive days.
My hours at work have gone back to normal, which means I was finally able to get on top of the house work. I'm not one to feel comfortable if there are lingering jobs waiting to be done.
But, now, I am at ease.
Tidying, sorting, washing, cleaning, ironing etc - all done! I've got the incense burning, fresh bunch of lilies from the garden and the fire on full blaze.
Not only all that, but I was able to catch a movie with my best friend (whom I love dearly).

So, after a busy day, it's time for a well deserved snack.


I've had these walnuts on to dehydrate for 24 hours, so now is as good a time as any to dig in.

Walnuts are super high in Vitamin E which has been found to significantly protect against heart problems. Also high in calcium, manganese, omega 3, copper, potassium and magnesium; walnuts provide so much of the good anti-oxidants that our bodies thrive on.

To properly engage these nutrients, I have activated these walnuts by first soaking them in water for 12 hours. This enables the nut to come alive again - literally. The enzymes in the nut start to break down as if it were about to grow. In doing this, your body is absorbing pure live nutrients rather than trying to break down the tough nut first. What better way to nourish your body than with living foods.
Even though they have been dehydrated, they are still activated as they have not been dried out too much to become dormant again.


Ingredients

(makes 3 cups)

3 c raw walnuts, soaked for 12 hours
2 tblsp malt extract
2 tsp vanilla extract

Thoroughly combine all ingredients in a large bowl.
Lay out on dehydrator trays and place on 40 C setting (level II for me).
Dehydrate for 24 hours.
Store in an airtight container for up to a week.

Tuesday, August 7, 2012

lemon myrtle and poppy seed cracker: raw


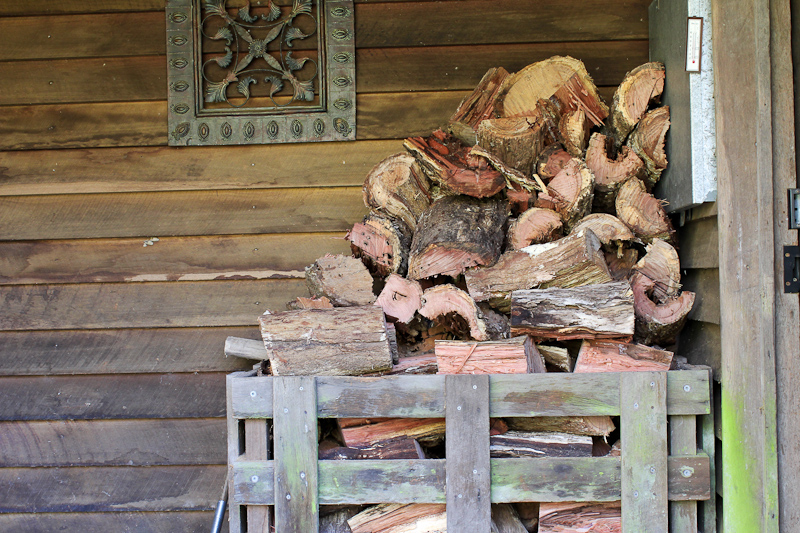
Last winter we would be out on the property every weekend, chopping, collecting and stacking firewood for the week ahead. We have been lazy this winter and used my father’s contact for bulk fire wood.


Sadly, this contact has now fizzled out and our wood pile has slowly dwindled to nothing.
So, we loaded into our run-around car and up the hill we went. Joel chainsaw’ed and I followed him around loading the car full of logs. Then when we got back to the house, we unloaded and Joel chopped it all while I stacked. We make a good team!

I love my lumberjack man.

It’s been forever since I’ve posted a dehydrated recipe. It still runs regularly with fruits, crackers or dog treats.

So I thought I would share my latest cracker recipe with you. It’s delightfully fresh with the hints of lemon and pepper, perfectly wonderful on their own or alongside a tasty dip.

I had the crackers run over night so they would be ready by the next day. After our wood collecting efforts we munched a few down, nourishing our bodies with the super healthy benefits of the chia and cashews.


Ingredients

(makes 3 trays worth or 40 crackers)

1/2 c black chia seeds
1 1/2 c water

1 1/2 c raw cashews, soaked for 12 hours
1 tblsp poppy seeds
1 tsp lemon myrtle
1 lemon, juiced
pinch of salt
1/2 tsp black pepper

Combine chia seeds and water and set aside for 30mins to activate seeds.
Place drained cashews in a food processor and whiz until smooth.
Stir poppy seeds, lemon myrtle, juice, salt and pepper into the cashew mixture.
Next, slowly fold through the chia seeds until well combined.
Spread mixture onto dehydrator trays.
Tip: I don't have many teleflex sheets, so I find it useful to line the trays with baking paper.
Dehydrate on whatever setting you would use for fruit (level 2 for me), for 5 hours.
Then score the crackers to whatever size you would like.
Dehydrate for a further 10 hours.


Wednesday, August 1, 2012

baked rice paper rolls


I have a love of rice paper rolls.
But, Joel has an absolute love of spring rolls.
They are both great for dipping and serving as an entrée.

Not so long ago I wanted to see what it would be like to bake a rice paper roll, to see if it would be a healthier option of the greasy spring rolls. I was so surprised with the outcome. Retaining their freshness but still having a crunchy outer shell, they made for a great alternative.

When I gave one to Joel, he did his infamous “mmm tastey” and I knew I was on a winner.


It’s fun wrapping up the spring rolls, it can take a bit of practice but it’s super easy once you get the gist of what you are doing.

Keep in mind that these baked rolls don’t have to be Asian inspired, but could be filled with anything that you wanted really. You can even make ahead and freeze them ready for a party or impromptu entertaining.


Ingredients

(makes 20)

20 rice paper roll sheets

1 tblsp seseame oil
1/4 cabbage, finely sliced
4 spring onions, finely chopped
1/2 c basil leave
2 large garlic cloves, finely sliced
olive oil spray

Heat over to 180 C and line a baking tray with baking paper.
Heat oil in a wok and toss in cabbage, onions, garlic and basil frying for 3-5 mins until softened and fragrant.
Remove from heat and cool.
Place one of the rice paper sheets in some luke warm water to soften (I usually do this under the tap).
Once softened lay sheet on a plate.
Place a tablespoon amount in the middle of the sheet running the mixture vertically. Fold the bottom of the sheet towards the middle. Next fold the left-side so the crease is at the edge of the filling. Then fold the top down and roll the spring roll to the right.
Repeat method with the rice paper, until all the mixture is used up.
Place rolls on baking tray and spray ever so lightly with olive oil spray.
Bake for 20 mins.
Serve immediately.