Showing posts with label vegetables. Show all posts

Wednesday, October 3, 2012

vegan risotto with truffle oil


You may not realise it, but I love any excuse to add truffle to a meal. I usually add it to a mushroom based dish and this one was not going to get away without a drizzle or two.

It’s such a whole sensory experience that compares to none other. When you sit down to a meal and smell the truffle, it’s like your first kiss, every time. Your heart skips a beat and you can’t wait to dig in, but you want to take it slow and savour every moment. What an analogy huh!


Risotto is an awesome one pot meal to spare you that laborious task of washing up too much. Adding to that beautiful experience.

I don’t know about you, but usually I find myself using heaps of pots and baking dishes when preparing dinner. It’s not so bad because I wash as I go – we’ve got a pretty tight kitchen so bench space is hard to come by. Actually, if I think about it, every night the dishes (bar the ones we eat on) are all washed up and stacked before we sit down to eat. Joel likes that because he is always on washing up duty but there is rarely much to do.


Ingredients

(serves 4)

1 tblsp olive oil
1 brown onion, finely sliced
200g button mushrooms, finely sliced
1 c arborio rice (risotto rice)
2 ½ c water
1 bunch asparagus, sliced into 1cm rounds
1 c peas, frozen or fresh
salt and pepper to taste
Optional: Tartufo Bianco (white truffle oil)

Heat oil in a heavy based saucepan, add onion and stir until softened.
Next add mushrooms and stir fry for approximately 5 minutes.
Add rice and mix for a further 2 minutes.
Then add 1 c of water to the pan and simmer until water has been absorbed, stirring minimally.
Next mix in the asparagus and add the remaining water.
Cover saucepan to cook through, approximately 15 minutes.
Finally add the peas stirring the risotto until the peas are cooked.
Season with salt and pepper, drizzle with truffle oil and serve.


Thursday, September 27, 2012

vegetable quiche


This is just a quick and easy recipe (bar the cooking time), that you can whip together in no time and leave in the oven to cook away.

I've used a variety of vegetables in this because it's so important to keep your diet varied with the vegetables and grains that you use. Each have a unique makeup of vitamins and minerals, so it really is vital that you vary what you eat so that you can get all the beneficial nutrition. If there is a vegie that you haven't heard of before, maybe consider trying it, if you're not sure ask around to see how others add it into their diet.


This recipe made enough to feed a family, but, with just the two of us at home we had a few leftovers. Making meals that are a little bigger is great for a quick lunch the next day or a meal stored in the freezer. This recipe is certainly no exception as it made the perfect healthy lunch for the next day, both cold and warmed up.


Ingredients

(makes 8-10 slices)

4 zucchinis, grated
2 potatoes, grated
3 carrots, grated
2 brown onions, grated
4 eggs, whisked
100g goats cheese, crumbled
¼ c nutritional yeast flakes
salt and pepper to taste

Heat oven to 150 C and grease a medium baking dish with olive oil.
Combine all ingredients well and press into dish.
Bake in oven for 1-1 ½ hours.
Remove from oven, cool for 5 minutes and serve.


Monday, September 24, 2012

garden breakfast juice


The weather is certainly getting warmer here and with it comes the desire for lighter and refreshing meals.
This also means that it is time to bust out the juicer and make it a permanent home on my bench top.


Before Joel ducked out to the markets to pick up groceries, I raided the refrigerator for what remnants of fruit and vegetables we had left to make a super breakfast juice. Talk about quick and easy breakfast! It’s just the clean-up that can be a bit of a fuss.. but it’s worth it.

I fed all the components through the juicer and poured it into a tall glass. Then went outside to sit in my garden to check on my summer seedlings and watch the little red-browed finches build a nest in the ficus tree next to our table and chairs.


Ingredients

(makes 400 mL)

2 carrots
3 oranges, skinned
1 grapefruit, skinned
1 inch piece of ginger
¼ bunch celery
1 medium beetroot

Wash all ingredient thorough and feed through the juicer.
Enjoy!

Wednesday, September 12, 2012

herbed chickpea salad


Absolutely love chickpeas and it has been too long between friends.

Like, seriously, way too long. I even expressed to Joel how excited I was to be having chickpeas for dinner. He sarcastically responded by saying, ‘that’s great honey’.


As you may have read in the last post, we did a whole lot of gardening on the weekend and I had to harvest all my herbs. I don’t really like using up all my crops as I feel safer with still some sitting there. It’s like, but what if I want some fresh mint later in the week? What will I do then! I even get a little precious and won’t use as much as I like, just so there is always something filling the pots. It makes me feel wealthy in a very green way.

Anyways, with the massive influx of herbs in my kitchen, I have been throwing them into everything. Handfuls of mint in some mineral water, chives in my cabbage wraps for lunch, parsley on EVERYTHING.

Chickpeas are so tasty and make an awesome protein packed ‘throw together’ salad-like meal. And best of all, they are inexpensive. Joel and I lived off legumes when we travelled Europe. They were the most filling, affordable meal addition for us vegetarians/pescatarians, on a very tight budget. 30 Euro cents (40c in Aus) would get you a 500g jar of pre-prepared beans, peas, lentils etc and would easily stretch 2 meals each.

You can get super creative with chickpea salads. I’ve just thrown in whatever I felt like when digging through the refrigerator, but any fresh vegetables will work.


Ingredients

(makes 4 serves)

1 ½ c dried chickpeas, soaked for 6-8 hours (or 2 drained and rinsed tins)
1 spanish red onion, finely diced
1 cucumber, diced
½ c of complimentary fresh herbs (mint, chives, parsley etc)
½ lime juice
salt and pepper to taste

If you are using dried chickpeas, place them in a pot of water and bring to the boil.
Simmer for 20-30 minutes.
Drain and set aside to cool.

Add all ingredients in a medium bowl and toss well to combine.
Place in refrigerator for 30 minutes - 1 hour for flavours to infuse.
Serve and enjoy.


Monday, September 10, 2012

raw kale chips


Productive weekends are the best, and that is exactly what this last one was for us.


We spent the weekend spring cleaning, tidying and sorting. I'm on top of the housework after vacuuming and dusting, washing and hanging, folding and ironing - it feels great. On top of all that we were able to spend heaps of time outside as the weather was stunningly perfect. Lots of walks, sun soaking and getting on top of some much needed garden work. The spring/summer garden is finally planted, and I'm really looking forward to impending crops - impatient much!?

I love that feeling of fulfilment and satisfaction from a wholesome weekend. And what's more, we have been fuelling our bodies with these delicious raw kale chips.


Ingredients

1 bunch of kale, wash and roughly torn
1 tsp paprika
1 tblsp olive oil
pinch or two of salt

Toss all ingredients in a medium bowl.
Arrange on dehydrator trays and turn on to 40 C.
Dehydrate for 12 hours or overnight.
Store in an airtight container for as long as they last. 


Monday, September 3, 2012

everything from scratch pizza


I love to make everything from scratch. Knowing what goes into the food you make/eat is so important these days. So many times have I looked at the back of packaging and not known 9 out of 10 of the ingredients listed.

Recently, I was having a lunch with my dad and we were at this café where their specialty was crepes. Dad was egging me on, so when I asked if it was dairy-free, the lady informed me that they pre-buy their crepes and that she would check. She started reading the list on the back to me: Energy, Fibre, Protein, Carbohydrates, Sodium. She then proudly announced that ‘nope, no dairy here’. I was stunned! She was reading out the nutritional information rather than the ingredients! I had no idea that some people may not know the difference between the ingredients and nutritional information. Not to mention that maybe everyone isn’t as much of a control freak as I am, and may not even pay attention to the ingredients of the food they are eating. It sure was an eye opener..


Anyways, to finish the story, I got my hands on the packet and read that it did in deed have dairy, so opted for a smoked salmon salad instead.

For a while now, I have been wanting to make this caramelised onion and pumpkin spelt pizza - ever since the organic food festival a couple of months back.


Ingredients

(8 slices)

300g pumpkin, skinned, deseeded and cubed
1 tsp olive oil

Dough
7g dried yeast
2 tsp raw sugar
2/3 c warm water

1 c wholemeal spelt flour (+ extra for kneading)
1 tblsp olive oil
pinch of salt

Sauce
5 fresh tomatoes, roughly chopped
8 cloves of garlic, minced
1 tblsp water
2 tsp malt extract
2 tsp apple cider vinegar
pinch of salt

Caramelised Onions
2 large brown onions, finely sliced
1 tblsp olive oil
2 tsp balsamic vinegar

fresh parsley to serve

Firstly, heat oven to 200 degrees.
Toss pumpkin and olive oil and place on a baking tray, in the oven for 30-40 mins.
Next, you will need to start the dough.
Whisk yeast, sugar and water in a small jug and set aside for 2 mins to activate.
Place spelt flour, oil and salt in a medium bowl.
Once the yeast is bubbly and activated, mix it into flour - knead until elastic and smooth (adding extra flour as needed).
Roll into a ball and place into a flour lined bowl. Cover and set aside to double in size (I find it helps to place the bowl above the warm oven).
Combine all ingredients for the sauce in a heavy based pan.
Simmer on medium heat until sauce-like (approximately 10-20 mins).
While you are waiting for your sauce to simmer down, add onions, oil and vinegar to a medium saucepan.
Heat on medium and toss the onions until softened and caramelised.
Remove from heat and set aside.

Assemble
Ensure the oven is on the highest heat setting.
Roll out dough on a floured pizza stone or baking tray (approximately 1.5 cm thick).
Spread over the tomato sauce, then the caramelised onions.
Finally, sprinkle over the roasted pumpkin.
Place in hot oven and bake for 35 mins or until the edges start to darken.
Remove from oven, garnish with parsley and slice into 8 portions.
Enjoy!


Monday, August 13, 2012

fresh pea citrus salad


Fresh peas will forever take me back to my childhood.

My Grandfather has always had a vegetable garden, even now when he is in his mid-eighties he is growing turmeric, ginger, squash, kohlrabi, passion fruit, tomatoes.. and the list goes on.

When I was younger, I would always raid his fresh pea vine.
Seriously, whenever we visited I would strip the plant of all it's juicy peas and devour them on the spot. Slowly making my way along the fence that the vine grew, I was like a pacman.


Not much has changed since childhood though.

Because whenever I visit now, I ask Granddad to take me straight to his garden and show me what he's been growing - although, I don't eat anything without permission these days.

But, if I'm super lucky, he'll pack me up some of his treats and send me on my way.


Ingredients

(makes a side for 2)

1/2 c fresh peas, shelled
1/2 c snow peas, diagonally sliced
1/2 lemon, juiced
1 tsp lime rind, finely grated
5 basil leaves, finely sliced
2 tsp olive oil

Combine all ingredients in a bowl and toss well.
Serve.


Monday, July 30, 2012

grilled snapper with daikon sesame salad


It's so great to grow your own veggies especially when you have not been able to made it to the markets. 

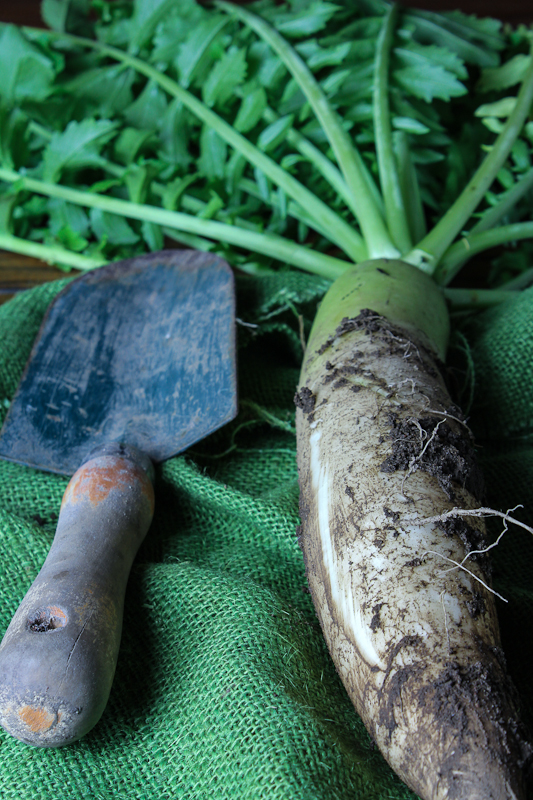
But, nothing else in my garden seems to last like the radishes. 
I guess the kangaroos and possums have not acquired a taste for this peppery vegetable.


I've been eyeing off my daikon radish for a while now. Watching it slowly grow higher and higher!
Finally it was ready for harvest and I knew exactly what I was going to build with it.

It's so rewarding growing your own veges. I love being able to wander outside and pick a few leafy greens for dinner, or a couple of herbs to garnish a meal.


I look forward to the day the Joel and I settle on our own acreage with a HUGE vege patch. I will grow everything.. including my own olives for pressing and a small vineyard for wine.

But for now, I'm content with the few things that I am able to grow.


Ingredients

(side serves 4-6)

1 large daikon radish
2 tblsp sesame oil
1 tblsp mirin sauce
2 tsp soy sauce
1 tblsp nigella seeds
pinch of Himalayan rock salt

4-6 portions fresh snapper 
oil

Shred or grate the daikon and toss with all other ingredients, leave in refrigerator for flavours to infuse.
Heat a grill pan, lightly oil and sear the snapper fillets for 4-5 mins on each side.

Serve.


P.S. Our weekend was well spent.