Showing posts with label condiment. Show all posts

Tuesday, July 3, 2012

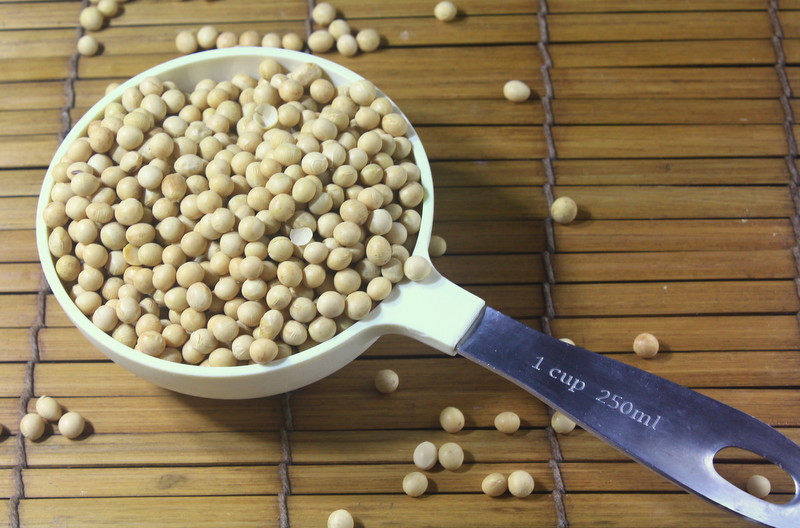
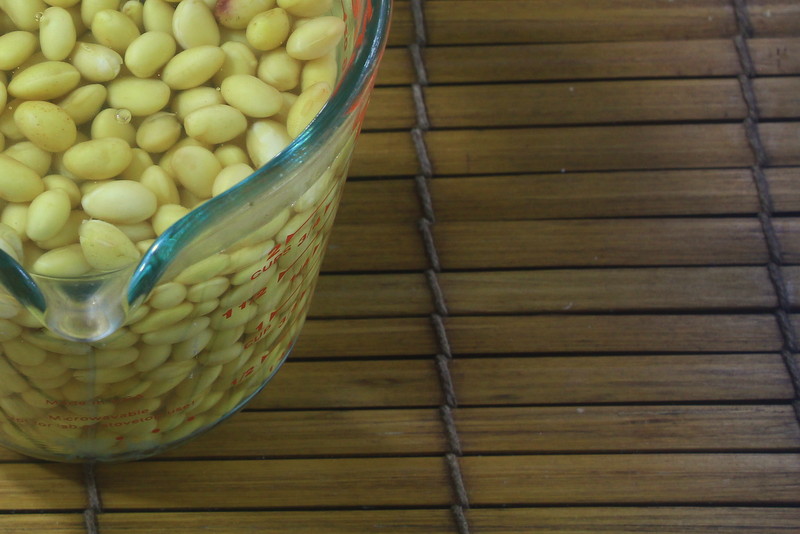
lupini beans: how to

I totally didn't know what I was getting myself into when I started soaking these beans.


Thinking they were just like any other dried legume it started with the usual soak, 12 hours. But when I went to look for a recipe that included the Lupini Bean, I quickly realised it was not going to be on the menu for dinner that night.


Similar to the process of preparing olives, this bean would need a lot of love and attention over the coming days.

With constant soaking in brine to draw out the bitterness, I was sure hoping it would be worth it.


The end result was unbelievably amazing.

It's like edamame beans crossed with olives.


These beans are high in fibre and protein and low-gi, so they make a tasty meal/side dish or eaten as is for a nutritional treat.

Ever since they've been ready, we've just been snacking on these beans by the spoonful.

Yum.
  

How To:

organic lupini beans
salt (heaps)
water

Soak the beans for 24 hours, drain.
Then, add the beans with a enough water to cover them and boil in a heavy based saucepan for 2 1/2 hours - topping up the water as needed.
Once boiled, strain and place in a large bowl.
Cover beans with water adding 1 tblsp of salt per 2 c water.
You will need to drain and replace the brine 2 times a day for about 3 or 4 days until all the bitterness is gone and the water is no longer yellowed.
Store in fresh brine in the refrigerator for about 2 weeks.


If you have the time and patience to give these little delights a try, I sincerely hope that you do.

Saturday, June 30, 2012

pumpkin spice almond butter

Yep, here's the follow on recipe from my previous post.

As mentioned - I've recently come into a wealth of pumpkin.


I was so happy when I came in to work and saw a large jap pumpkin sitting under my desk.

To be honest, right then and there I was already looking forward to getting home and preparing this recipe - needless to say, it was a long day.


Smooth and creamy, this pumpkin butter won't last long in your household.

Spread over some homemade bread or use as a fruit dip, it's like you're eating a pumpkin pie - only healthier!


Ingredients

(makes 500mL)

1 c roast pumpkin puree
1 tblsp back strap molasses
1 tsp ginger, ground
1 tsp cinnamon, ground
2 clove heads, crushed
1 cardamon pod, crushed
1/2 tsp nutmeg, grated

Combine all ingredients in a food processor and blend until creamy and smooth.
Store in refrigerator for up to 2 weeks.


Thank you dear pumpkin bringer - this one's for you! xo

Tuesday, June 26, 2012

sour orange and fresh coconut sauce


The other day when coming home, we pulled into our street to see two of our little neighbours holding up "oranges, lemons, mandarines - for sale".

They were so cute! I think that was their main marketing strategy.


The two girls had a little table set up at the start of the road, trying to catch customers.

I HAD to stop.

They'd gone out earlier that day and picked some fresh citrus fruit from their orchard.

I ended up with $4 worth of goods (2 kg oranges, 5 lemons, 5 sour oranges). As a tip I gave each of the a $2 coin for being so adorable, they were so happy.


This sauce is super versatile - you could use it as a sweet, kind of like a lemon curd, or you can add it to some grilled tempeh/tofu steaks. We ended up eating it with some steamed blue-eye cod.

Ingredients

(makes 400mL)

2 sour oranges, peeled and de-pitted
1 c young coconut flesh
a pinch of vanilla salt

Combine all ingredients in a blender/food processor and whiz until thick and creamy.


Serve.

Thursday, May 31, 2012

homemade roasted almond butter

I'm forever topping up our stash of homemade nut butter and the most recent is this basic roasted almond butter.
Seriously, you'll be surprised at how simple it really is to make.

Friday (my day off) is usually my cooking and cleaning day. So, when it comes to making the almond butter, I just put the almonds in the oven to roast while I vacuum the house. Then come back and take out the tray to cool, go and clean the bathroom, come back and whack the roasted almonds in the food processor while I scoot around and tidy a few things (checking the food processor intermittently). 
Then it's done. And so is the house work, bonus!


I cannot rave enough about how amazing this nut butter is.
It's so smooth and deliciously versatile - makes for a perfect breakfast topper, snack or protein in a salad/sandwich.

This recipe requires nothing other than straight up almonds. No oil. No sugar. And definitely no artificial preservatives.

Almonds are high in monounsaturated fats, the same type of health-promoting fats as are found in olive oil, so even when stored in the refrigerator the nut butter does not 'set' but remains in a thick runny consistency. 
It's not like any of the store bought kind of nut butters that seem to have a thick layer of oil sitting on the top, where the under layer is this dry, tacky kind of goo.

To be honest when I first homemade almond butter, I was so unsure as to whether I made it right. The nut butter didn't separate - as in the natural oils didn't rise and sit on the top which is what I was used to.
Maybe that's because it's made fresh, but what ever it is, it's addictively beautiful!


Ingredients

(makes 300 mL)

500 g raw almonds
pinch of Himalayan rock salt to taste (or more)

Arrange almonds in a single layer on a baking tray lined with baking paper.
Heat oven to 180 degrees and roast almonds for approximately 15-20 mins - until the oils have released.
Remove from oven and cool completely.
Place in food processor and using 'S' blade, process for about 7-10 mins until smooth and runny. 
You will need to stop the processor and scrape down the sides periodically.
At this stage you will need to taste test and add the salt as desired - processing well between additions.
Store in a container in the refrigerator for 1 - 2 weeks (if it lasts that long!).

Processing the nut butter

Love x

Friday, May 18, 2012

fresh homemade tofu


Late last year we drove across the country to visit my brother and sister-in-law who live in Esperance.
It's a gorgeous little town on the southern coast of Western Australia with Australia's whitest beaches and bluest oceans.


A one way trip took us 36 hours of driving, broken up into 3 days.

It's not about the destination, but the journey. The drive was very therapeutic and we got to chatter away about life and dreams - not to mentioned tore our way through a couple of audio books.

One of which was 'Under the Dome' by Stephen King.
Not the most comforting author to be listening to when your out camping in the middle of the dessert!


Anyways, enough of that.

While we were in Esperance, I insisted that we visit the local health food store.

While browsing the shelves, Joel discovered this 'Tofu Making Kit'. 
As a huge advocate for making everything from scratch, I just HAD to get it.

Funnily enough, the lady at the counter explained that it was her family who made the Nigari from the local Lake Crystal, Pink Lake.

What came in the kit was a mould, muslin cloth and Nigari.
Nigari is Magnesium Oil. Essential to life, magnesium is crucial for optimum health and vitality.


This recipe calls for the Nigari, but if you don't have any or you can't get your hands on it, ask your local health food store if they have any Magnesium Oil - it should do the same thing.

Homemade tofu is unlike anything I have tasted before.
It's delicious and so smooth!

Makes me wonder what they put in the store bought kind, that makes it taste so different.

This recipe first explains how to make soy milk from the soy beans (no Nigari required for this), then how to make the tofu from the milk.


Utensils

kettle
blender
heavy based saucepan with lid (medium-large)
mould (can use an old container with holes poked through)
muslin cloth (or new chux cloth)
strainer/colander
jug
large bowl
wooden spoon
slotted spoon

Ingredients

(approximately 450g)

1 c soy beans
15 ml Nigari (for firm tofu, use less for silken)
water

Start off by soaking a cup of soy beans for 8-12 hours.


Once soaked, you end up with about two cups of beans.
Drain and place in a blender with 3 cups of boiling water.
Blend for 1-2 minutes until you have a smooth paste.
Pour the contents of the blender into a heavy based saucepan.
Add 4 cups of boiling water and bring to the boil.
Once at boiling point, remove from stove.


Strain the contents of the pot through a moist muslin cloth lined colander/strainer, into a jug.
(Tip: The mixture will be hot, so use kitchen gloves at this point).
Squeeze all the moisture out of the muslin cloth.

At this stage you have 2 things:

*Okara - soy bean fibre (not required for the rest of the recipe)
1 1/2 L Soy Milk - you can stop here if you're just after soy milk

*Most people discard this, but Okara is full of nutritional properties and can be used in other recipes where flour or binding ingredients are required.
I will be posting an Okara recipe as my next post, so stay tuned.
Store the Okara in the refrigerator for up to 3 days.


Taking the soy milk, pour contents back into the saucepan (ensuring the pot has been cleaned).
Bring to the boil and simmer for 7 minutes.
Combine the Nigari with 1/2 c of boiling water and mix well.

Remove the pot from the stove and using the wooden spoon stir the milk from side-to-side (6-8 times) while drizzling 1/3 of the Nigari mixture into the pot.
Remove the spoon and drizzle over another 1/3 of the Nigari.
Cover the pot and stand for 5 mins.
Curds will start to appear on the top of the mixture.
While lightly stirring the top 1/2 inch of the mixture, drizzle over the final 1/3 of the Nigari.
Cover and stand for a further 5 mins.

Line the mould with cleaned muslin cloth and sit in a colander over a bowl.

Using a slotted spoon, spoon out the curds into the mould.


Fold the muslin cloth over the top of the curds and press a weight on top (or a plate if using alternative).
Let the moisture drain out of it (4-5 mins).


Next, place the mould in a bowl of iced water for 5 minutes while it firms up.


Remove tofu from the mould and serve fresh in your favourite dish.

If you are wanting to keep the tofu for longer, you will need to place it in a bowl of water, cover and store in the refrigerator - replacing the water daily.
Will keep for up to 3 days.

Sorry about the marathon post! xo

Tuesday, April 24, 2012

low-gi vanilla raspberry jam

When it comes to jams, we're not big consumers.
But I enjoy making jams and preserves. 
Preserves make the perfect gifts - they keep well and are homemade and personal.

I came up with this recipe over the Christmas period, as I was getting the pressies ready for the family.
I just kept tasting and adding bits and pieces and came out with a winner!
This jam is not overly sweet as it uses all low-GI sweeteners and goes perfectly with homemade peanut butter.


This jam was so good I even kept the recipe!
Recently I had some raspberries sitting in the freezer and decided to make up a batch of jam to keep stored away in the refrigerator to be spread on a bit of homemade bread for a quick breakfast.


You will notice that I have used Coconut Sugar. If you are unfamiliar coconut sugar has a naturally Low Glycemic Index (GI 35), nearly half the GI of cane sugar (GI 68) and still lower than honey (GI 55) and even agave (GI 42). This super food has the added bonus of a nutritional content richer than possibly all other commercially available sweeteners!

It contains protein (12 amino acids) and high mineralization of potassium, magnesium, phosphorous, zinc and iron.

The taste - well it's just like sugar but with a caramelly/coconutty after taste.


Ingredients

(makes approx 400 ml)

500 g frozen or fresh raspberries
1 vanilla pod, de-seeded
1/2 c raw coconut sugar
1 tblsp brown rice syrup
1 tblsp pine tree syrup
1 tblsp agave syrup
1 tsp raspberry vinegar
1/2 a medium lemon, juiced

Combine all ingredients (vanilla seeds and pod) in a heavy based saucepan and simmer down for about 1 hour, stirring occasionally - or until jam sets on a plate when tested.
Remove vanilla pod and store jam in a sterilised jar in the refrigerator.
Will keep for ever - or at least 4-6 months.


Spread em xo