Tuesday, May 15, 2012

raw protein energy balls

This past weekend we spent canyoning.
It was so much fun! But just a little chilly.

This recipe is something that I whipped up last week to take with us.

High protein energy hits.


It’s just what we needed while tackling the uphill climbs, 25m waterfall abseils, giant boulders and not to mention the last three hours of hiking and navigating in the dark.

I will definitely be making these again! Especially for the snow skiing later in the year.


While I was making these, I just kept adding bits and pieces that I know would be super nourishing for our bodies and was so surprised when rolling the balls that the mixture turned out to make 40!

I think I'll be freezing half the batch for a quick snacks at a later date.


Ingredients

(makes 40)

2 c triticle flakes, soaked for 12 hours and drained
1/2 c dried dates, soaked for 12 hours and drained
1/2 c raw peanuts + extra
1/4 c shredded coconut + extra
2 tblsp chia seeds
1 tblsp raw super food powder*
2 tblsp raw protein powder
1/4 c dried cranberries
1/4 c almond butter
3 tblsp agave syrup
1/4 c raisins
10 drops stevia

Combine all ingredients in a food processor and process until well combined - should resemble a sticky dough-like consistency.

In a mortar and pestle combine the extra coconut and peanuts (you could also add a pinch of vanilla salt).
Grind until the peanuts a broken into pieces.

Scoop out tablespoon size portions of the processed mixture and using wet hands, roll into balls.
Then roll the balls in the coconut and peanut mixture and set in the refrigerator over night.

You can store in an airtight container in the refrigerator for up to a week, or freeze for later consumption.

*I use a super food powder that is a mix of the top 15 super foods (known) of the world.


Unfortunately I didn’t get the camera out for the abseils or the glow worm tunnel, but here’s a couple of snap shots.

Morning view of the mountains.

Cooking up our oats for breakfast.

Ice on the tent. Brrr.

View from the first cliff climb.

Morning tea with our energy balls.

Last bit of sunlight for the afternoon.

Sunday, May 13, 2012

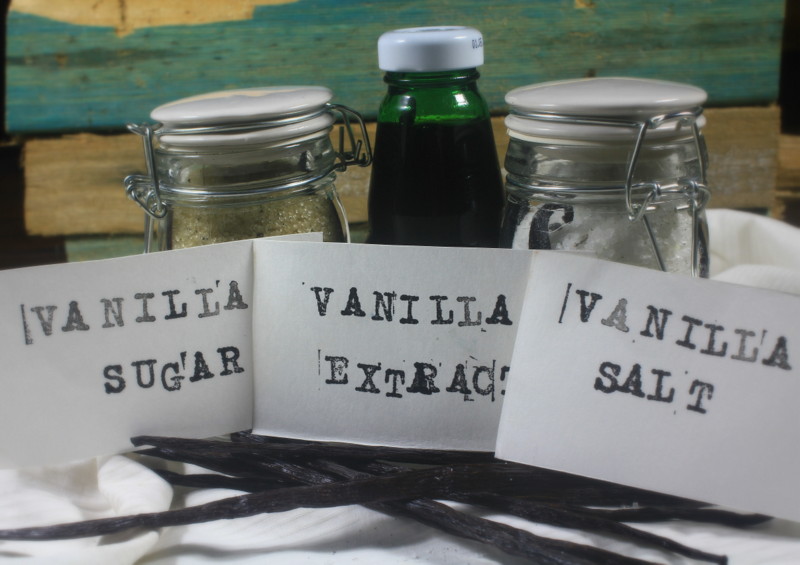
homemade vanilla extract, salt and sugar

This is a post about Mothers Day.

Well, my Mothers Day gift to be more precise.

I love making kitchen gifts for my family and friends. It gets harder to buy gifts for people when we get older, because if someone really needed something, they wouldn’t wait around for someone to get it for them – but they would just go out and get it themselves!

So at least this way my gifts are personalized and hopefully none of my siblings have the exact same thought.


Homemade gifts take some prior thought.
What am I going to make? How long will it take? What ingredients am I going to need?

I start thinking about these things about 2 months before hand, and this time for Mothers Day I came up with the idea of giving a vanilla gift package – with salt, sugar and extract.

Vanilla is a bit of a safe option for mothers. It’s a beautiful smell and everybody uses it at some point!

The vanilla extract would take some time though. About 6 weeks of infusion time, so I needed to act pretty quickly.

Jumping online I ordered a 250g bag of Madagascan Vanilla Beans for $38!
When they arrived I was so excited and blown away by the 80 odd beans I now had at my disposal.

I got straight to work.

Vanilla Extract


Ingredients

(makes 200 ml)

5 vanilla beans
200 ml vodka*

Split the vanilla beans in half and stuff them into a sterilised 200 ml jar or bottle.
Top with the vodka.
Store in a cool dry area.
Shake vigorously twice a day for a week.
Then once a day for the week after that.
Then at least once a week after that, for up to 6 weeks.
After the 6 weeks is up, you will have your homemade vanilla extract.

Tip: when you have used about half of the vanilla extract you can top it back up with vodka, shake and infuse for a further 2 weeks. 
Then you should be right to go again.

*doesn't need to be the highest quality


Vanilla Sugar

Ingredients

(makes 300 ml)

300 ml raw sugar
1.5 vanilla beans

Split the beans in half length ways and scrape out the seeds.
Combine the seeds and sugar in a bowl and mix until thoroughly combined.
Place the empty vanilla pods in a sterilised 300 ml jar and pour the sugar mixture on top.
Seal and you're done!


Vanilla Salt

Ingredients

(makes 300 ml)

300 ml rock salt
1.5 vanilla beans

Split the beans in half length ways and scrape out the seeds.
Combine the seeds and salt in a mortar and pestle, mix until thoroughly combined and the rock salt resembles fine crumbs.
Place the empty vanilla pods in a sterilised 300 ml jar and pour the salt mixture on top.
Seal and you're done!


This Mothers Day we were away canyoning, so last week Mum, my sister and I went out for a girls night. We had dinner and a movie, and afterwards we went to a café and each had a steaming cup of Madagascan Vanilla Tea – ironic huh! Mum didn’t even know that was the theme for her gifts.


I love my Mother and this is only a small token of my appreciation.

How she puts up with my endless ramblings, I’ll never know!

Love x

Tuesday, May 8, 2012

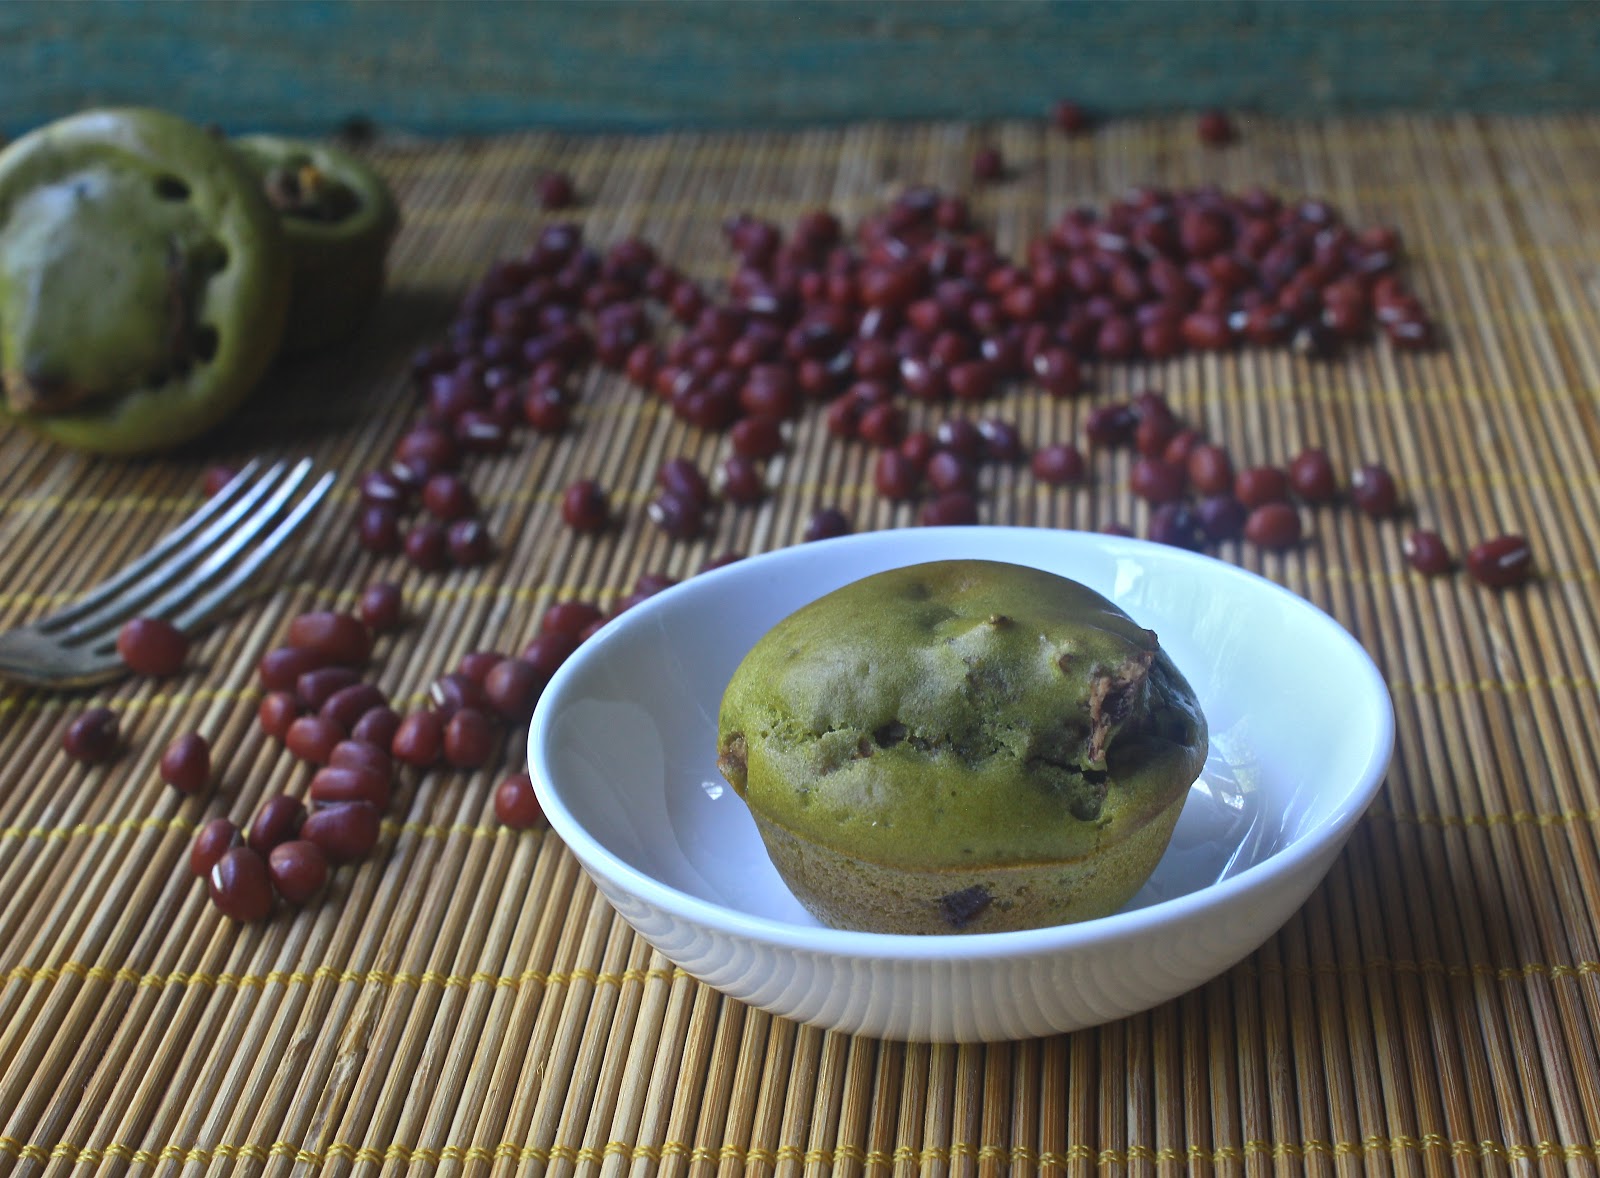
matcha mini muffins with sweet adzuki bean paste

Seriously couldn't help myself!
This is what happens when you have a new toy in the kitchen.
Why, oh why did it have to be a mini muffin tin!

So, I guess if I'm going to make a sweet, I'd better make it some what healthy.


I had been wanting to try adzuki bean paste with these adzuki beans I recently purchased. 
Traditionally the bean paste requires a lot of sugar, but I've kept the sweetener to a minimum - you could add more sugar if you wanted.

As it's a bit of an Asian sweet, I thought it may be interesting to pair the adzuki beans with some matcha green tea powder.

Then I had this thought of mini muffins filled with the sweet bean paste.

So, that's where I came up with these matcha mini muffins with sweet adzuki bean filling.


They turned out great! I was really surprised and pleased with this creation.

Joel says he's confused by the muffin.


Ingredients

(makes 12 mini muffins)

Adzuki Bean Paste

1 c adzuki beans, soaked for 8-12 hours and drained

10 drops of stevia
1/4 c coconut sugar

Put the soaked beans in a heavy based saucepan with about 2-3 cups of water.
Bring to the boil and simmer for 1 hour*.
Remove from heat and drain excess liquid off, keeping an inch of water in the bottom of the pan.
Add the sugar and stevia, stir through until sugar is dissolved.
Using a fork or masher, mash down the bean mixture until it resembles a thick paste.
Set aside to cool.

*you will need to check the water level, adding more water if needed to ensure the beans don't burn.

Muffin Batter

1 organic free-range egg

1 tsp matcha powder
1tsp vanilla
8 drops stevia
2 tblsp coconut sugar
1/4 c self raising flour

Heat oven to 150 degrees.
Beat the egg until thick and creamy.
Add the remaining ingredients and beat until a thin batter-like consistency.

To assemble

Spoon approximately one heaped teaspoonful of the matcha batter into a non-stick mini muffin tray*. 
Next spoon a teaspoon of the adzuki bean paste** on top of the batter.
Then, divide up the remaining batter and pour over the bean paste.
Bake in oven for about 15 mins.

*If using a tray that is not non-sick, spray with olive oil first.
**If you find that you have left over paste, you can freeze it easily.


yummm xo